Free worldwide shiping on $150+
Tutorial Part 2: Drive, Map & Navigate Your Proscenic M6 Pro in ROS 2
Tutorial Part 1 got SangamIO running on the vacuum, exposing its motors, wheel encoders, IMU and LiDAR over TCP port 5555. Part 2 connects that to ROS 2 the easy way — a prebuilt Docker image that already bundles everything: ROS 2 Jazzy, the vacuum_ros2_bridge, the proscenic_m6pro robot description, an EKF for odometry, cartographer SLAM, Nav2, RViz and keyboard teleop. No manual colcon builds, no dependency hunting.
By the end you’ll drive the vacuum from your keyboard, watch its LiDAR in RViz, build a map of a room, and — optionally — do all of it from across the internet.
What you’ll need
- The Proscenic M6 Pro running SangamIO (from Part 1), powered on (solid LED — see Quirks below) and on your Wi-Fi/LAN. Note its IP address.
- A PC (or VM/WSL2) with Docker installed. No ROS 2 install needed — it’s in the image.
- Both on the same network for the first run. (Remote operation is covered at the end.)
Step 1 — Get the makerspet/oomwoo image
The makerspet/oomwoo image is a ready-to-run
ROS 2 Jazzy workspace for several educational robots, including the Proscenic M6 Pro.
docker pull makerspet/oomwoo:jazzy-devStart it with the helper scripts from the oomwoo-install repo (they wire up X11 for GUIs and the ports the bridge needs — TCP 5555 for commands and UDP 5555 for telemetry):
# Linux
./docker/utils/start_jazzy.sh
# Windows
docker\utils\start_jazzy.cmd
You’ll land in a shell inside the container at /ros_ws, with the workspace already built
and sourced.
Step 2 — Select the robot model
The image supports several robots; tell it which one you have, and where it lives:
kaia config robot.model proscenic_m6pro
kaia config robot.ip <VACUUM_IP>
robot.ip is a convenience — the bring-up launch file reads it so you don’t have to pass
the IP every time. (You can still override per-launch with robot_ip:=<ip>.)
Step 3 — Bring up the robot
ros2 launch proscenic_m6pro bringup.launch.pyThis single launch starts four nodes that together turn the raw SangamIO stream into a proper ROS 2 robot:
| Node | Job |
|---|---|
vacuum_bridge | Connects to SangamIO; publishes /scan, /odom, /imu, /battery, /vacuum_status, bumpers/cliffs; subscribes /cmd_vel. Reconciles frames to base_footprint / base_scan. |
robot_state_publisher | Publishes the URDF + the static TF tree (base_footprint → base_link → base_scan, wheels). |
joint_state_publisher | Publishes the wheel joint states (so the wheel links have transforms). |
ekf_filter_node | Fuses wheel odometry and publishes the odom → base_footprint transform that SangamIO doesn’t provide and that SLAM requires. |
Enable the LiDAR first. On the M6 Pro the drive motors stay gated until the LiDAR is enabled (see Quirks), so do this right after bring-up:
bash
ros2 service call /set_lidar vacuum_ros2_bridge/srv/SetLidar "{enable: true}"
Sanity-check the pipeline:
ros2 node list
ros2 topic hz /scan
ros2 run tf2_ros tf2_echo odom base_footprint
Get new tutorials by email
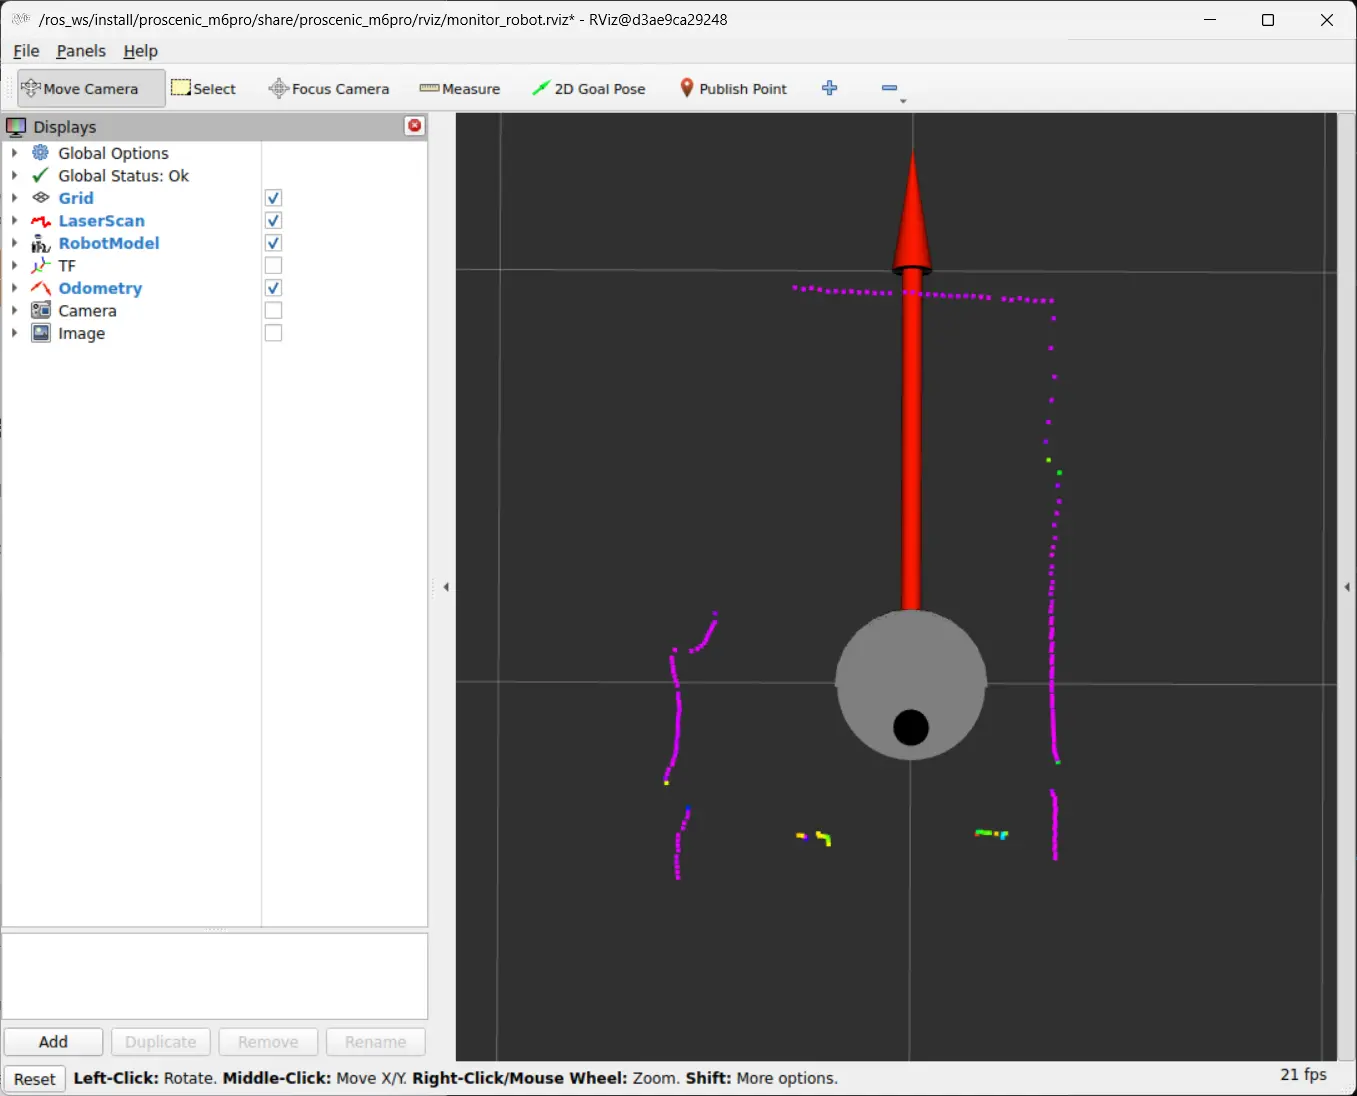
Step 4 — Visualize in RViz
In a second container shell (docker exec -it <container> bash):
ros2 launch proscenic_m6pro monitor_robot.launch.pyYou should see the gray robot model and a ring of LiDAR points. A good smoke test: drive the robot forward (next step) and watch the scan points — they should stay fixed in the world while the robot model moves through them. If the points drag along with the robot, your TF is wrong (see Troubleshooting).
Step 5 — Drive it, and calibrate the speed
Keyboard teleop:
ros2 run kaiaai_teleop teleop_keyboardThe M6 Pro tops out at roughly 0.36 m/s. Keep teleop and Nav2 max speeds at or below that — commanding more just saturates the motors and throws off odometry.
The bridge converts /cmd_vel (m/s, rad/s) into SangamIO device units using two scale
factors in sangamio.toml. The calibrated defaults shipped in the fork are good, but if
your odometry distance/rotation doesn’t match a tape measure, re-calibrate:
# drive a known speed, measure from /odom, get the suggested scale
ros2 run vacuum_ros2_bridge calibrate_velocity.py --linear 0.2 --duration 15 --current-scale 4400
ros2 run vacuum_ros2_bridge calibrate_velocity.py --angular 0.5 --duration 15 --current-scale 523
Set the suggested linear_velocity_scale / angular_velocity_scale in /etc/sangamio.toml
on the vacuum and restart SangamIO (the config is read once at startup). Always pass the
value currently in the file as --current-scale; a re-run should then report a ratio ≈ 1.0.
Step 6 — Build a map with SLAM
With bring-up + the LiDAR running, start cartographer SLAM:
ros2 launch kaiaai_bringup navigation.launch.py slam:=TrueDrive a slow loop around the room (≤ ~0.2 m/s, gentle turns) and watch the map fill in in RViz. When it looks complete, save it:
ros2 run nav2_map_server map_saver_cli -f ~/maps/my_roomStep 7 — Autonomous navigation (optional)
Relaunch with your saved map instead of SLAM, then set goals with the 2D Goal Pose tool in RViz and let Nav2 plan and drive:
ros2 launch kaiaai_bringup navigation.launch.py map:=$HOME/maps/my_room.yamlNav2 obeys the same speed/footprint limits tuned for the Proscenic (robot_radius ≈ 0.175 m,
max_vel_x ≈ 0.2 m/s).
Step 8 — Remote operation (off your LAN)
You can drive and map the vacuum from anywhere. Point the bridge at the local end of the tunnel:
ros2 launch proscenic_m6pro bringup.launch.py robot_ip:=<VACUUM_IP>The telemetry connection uses UDP. If UDP packets get lost, the bridge will automatically switch from UDP to telemetry over TCP.
Watch the handshake — bridge log: requesting TCP-telemetry fallback; SangamIO log:
Telemetry transport -> Tcp. After that, /scan, /odom, /imu flow over the tunnel
exactly as on the LAN. (Throughput is ~30 KB/s — trivial over the internet.) Reconnects are
sticky-fast: once TCP telemetry has worked, the bridge requests it immediately on reconnect.
You still can’t power on a vacuum that has gone to standby remotely — see Quirks.
How LiDARs are used in self-driving robots?
Build a real LiDAR self-driving Arduino/ROS2 robot using our kit - with complete step-by-step instructions. No robotics experience necessary.
See the full robot kit →Quirks & safety (Proscenic M6 Pro)
The M6 Pro is a stock commercial vacuum, so some behaviors are baked into its hardware:
- Long-press to power on. With Linux/SangamIO running but the robot “off” (breathing LED), the motors and LiDAR are physically gated. A long-press of the power button (solid LED) un-gates them. This can’t be done remotely — if the robot sleeps while you’re away, drive and LiDAR won’t respond until someone power-cycles it on site.
- The LiDAR gates the drive motors. After a power-on the motors ignore
/cmd_veluntil you enable the LiDAR. Any/cmd_velyou sent beforehand is buffered and kicks in the moment the LiDAR comes up — so enable the LiDAR before publishing velocities, and be ready. - Disabling the LiDAR does not stop the motors. Use a zero
/cmd_vel(or teleop stop) to halt; don’t rely onSetLidar {enable: false}. - State can survive a reboot. An enabled LiDAR + running motors sometimes persist across a
Tina Linux
reboot. A full power-cycle is the reliable reset.
Troubleshooting
- RViz: “frame [odom] does not exist” and/or scan frame is
laser. You launched the barevacuum_ros2_bridgeinstead ofproscenic_m6pro bringup.launch.py. Only the bring-up startsrobot_state_publisher(the model +base_scanframe) and the EKF (theodomframe). Run the bring-up. - No
/scan,/odom,/imuwhen remote (but TCP connects). UDP telemetry can’t cross NAT — use the SSH-tunnel + TCP-fallback flow in Step 8. - LiDAR reports OK but no points /
partial scanwarnings. The LiDAR motor isn’t spinning — almost always the power-gating quirk (long-press on). - Scan drags with the robot / model spins the wrong way. A TF/odometry problem. The shipped
ekf.yamlfuses wheel odometry only (the SangamIO gyro currently needs axis/scale correction), which is accurate; if you re-enabled IMU fusion, disable it. Message Filter dropping message … queue is full. Usually a missing/late transform for the scan frame — confirmtf2_echo odom base_scanresolves.
Credits
- codetiger/VacuumTiger (SangamIO)
- kaiaai/VacuumTiger fork
- remakeai/vacuum_ros2_bridge
- makerspet/oomwoo ROS 2 image.