Free worldwide shiping on $150+
Building an Open-Source Robot Vacuum — Meet OOMWOO
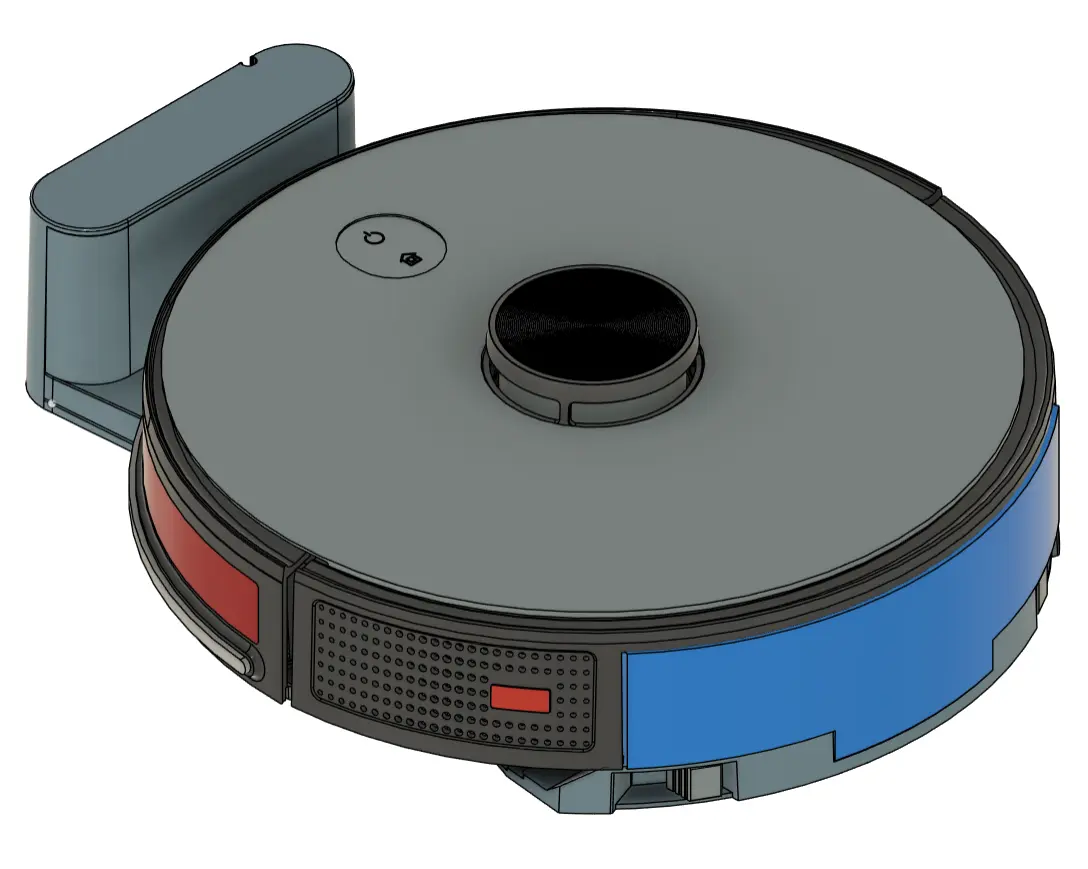
I’m starting a new build-in-public project: oomwoo, an open-source robot vacuum you build yourself. Raspberry Pi, ROS 2, 2D LiDAR, Home Assistant, 3D printed, local-first — and open from the first commit.

Today I’m kicking off my most ambitious Maker’s Pet project yet: OOMWOO, an open-source home robot vacuum that you can build yourself. Open hardware, open firmware, open software — and built in public, from the first commit.
No cloud required. No vendor lock-in. It maps your home with an affordable 2D LiDAR and navigates on its own, runs locally, and integrates natively with Home Assistant. If you’re into making a vacuum that cleans well, Raspberry Pi, ROS 2, 3D printing, or just the idea of owning a vacuum you fully understand and control — this one’s for you.
About the name: “OOMWOO” is a rotational ambigram — it reads the same flipped 180°, just like the robot itself roaming your floor in every direction.
What OOMWOO is
OOMWOO is a build-it-yourself robot vacuum designed for the maker community:
- Affordable and fully open — hardware, software, and firmware
- 2D LiDAR mapping and autonomous navigation with ROS 2 / Nav2
- Native Home Assistant integration for local control
- 3D-printable, documented, hackable chassis
- Local-first — no cloud needed for everyday cleaning, ever
- Home-appliance quality — not a throwaway build
- Step-by-step, zero-to-hero build instructions, with a complete bill of materials so you can source every part yourself
Optional extras — cloud features, and eventually an app store of ROS 2 apps to customize how your vacuum behaves — will layer on top. But the core promise never changes: the vacuum always works cloud-free and local, out of the box.
Where the project is today
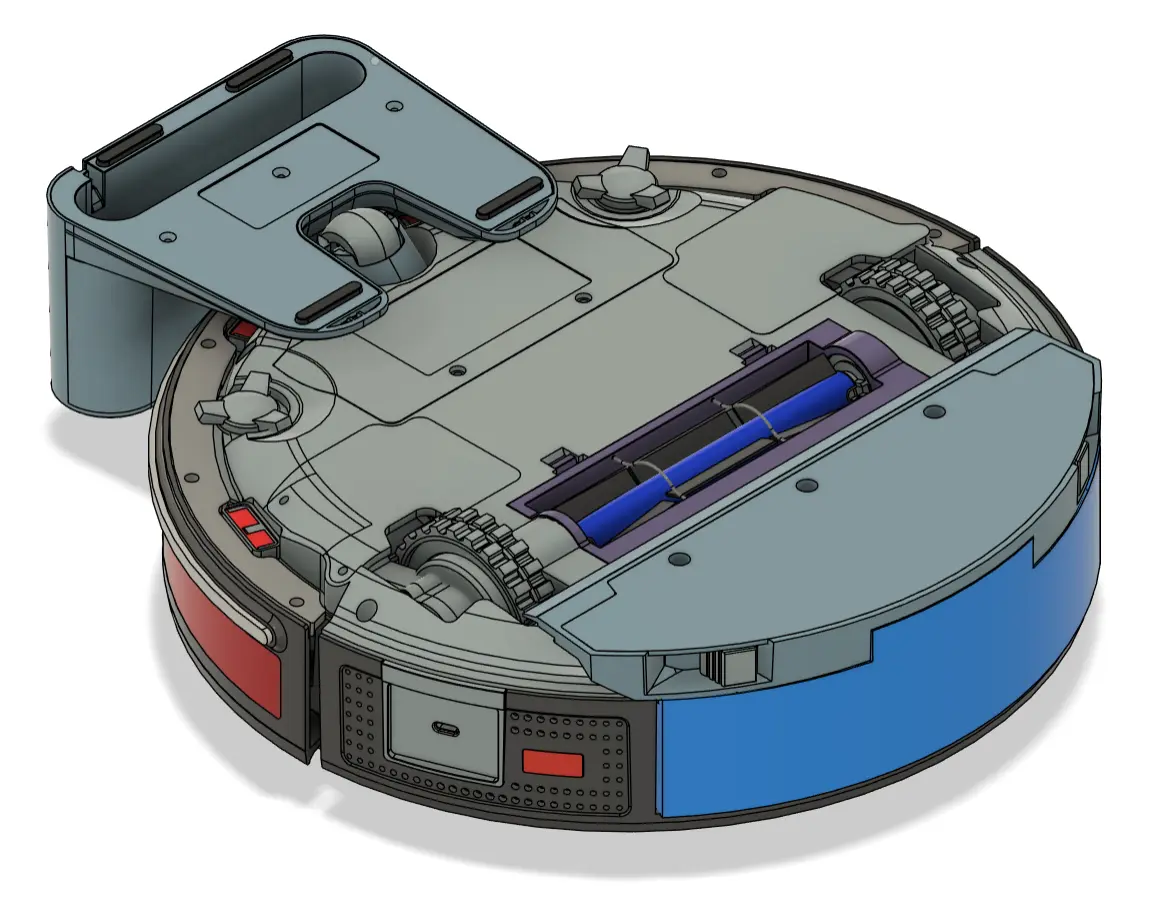
This is genuinely early hardware-wise — and that’s the point of building in public. I’m in the process of sourcing key parts at the moment. You can follow my parts sourcing progress here.
Software-wise, the software development environment is ready. You can install it and run OOMWOO (in simulation, no hardware) in, say, 15 minutes. Please follow this tutorial. You can contribute robot software to the project – and test it at home with a real vacuum cleaner – without waiting for the hardware is being developed. How? By using another real consumer vacuum cleaner as a “placeholder”. Please see this, this and this tutorial for instructions.
The first milestone (v0) is a bare-bones, working build:
- 3D-printed chassis
- ROS 2 Gazebo simulation
- LiDAR with manual SLAM
- ROS 2 on a Raspberry Pi 5 and/or ESP32 running micro-ROS (final architecture still being decided)
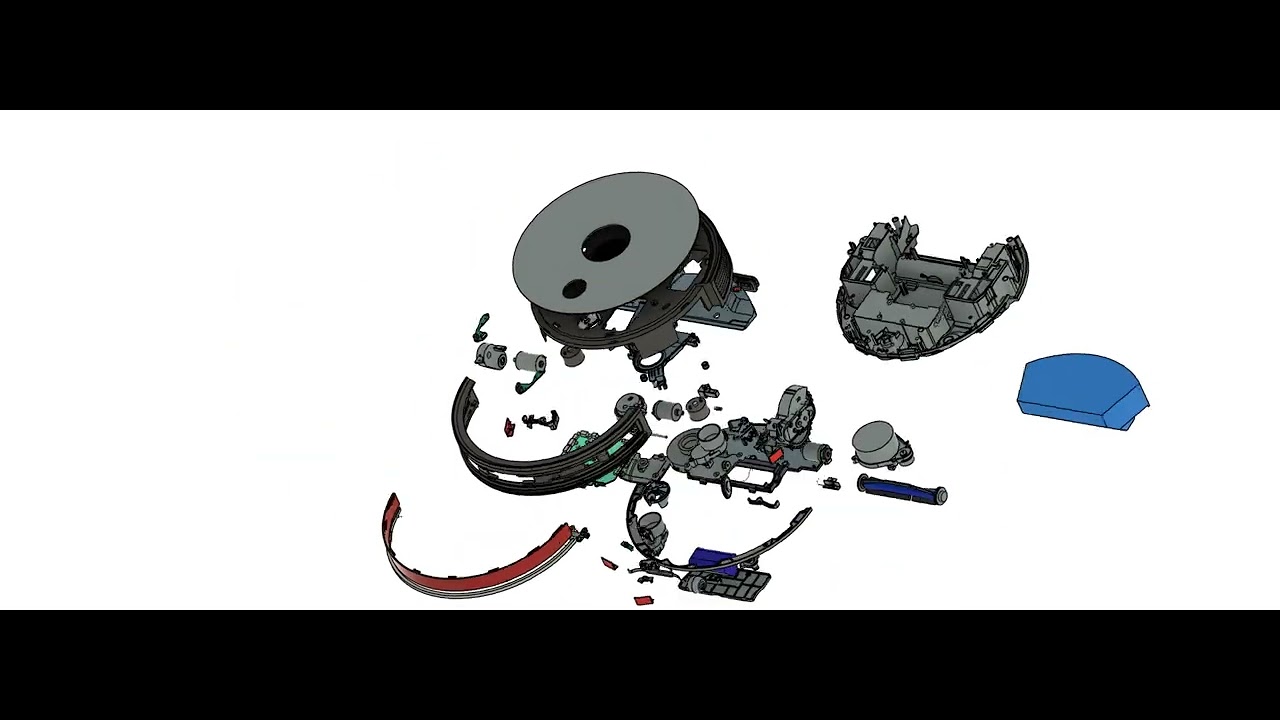
The open-source deliverables include:
- Bill of materials, early work-in-progress
- 3D-printable files (not available yet)
- Software development environment – ready to use, install today
- Firmware (not available yet)
- A motor-driver and sensor I/O PCB (repo to be announced shortly)
- Build instructions (not available yet)
- Full build-along, bring-up, troubleshooting docs demo videos (not available yet)
Build it with me — massively in parallel
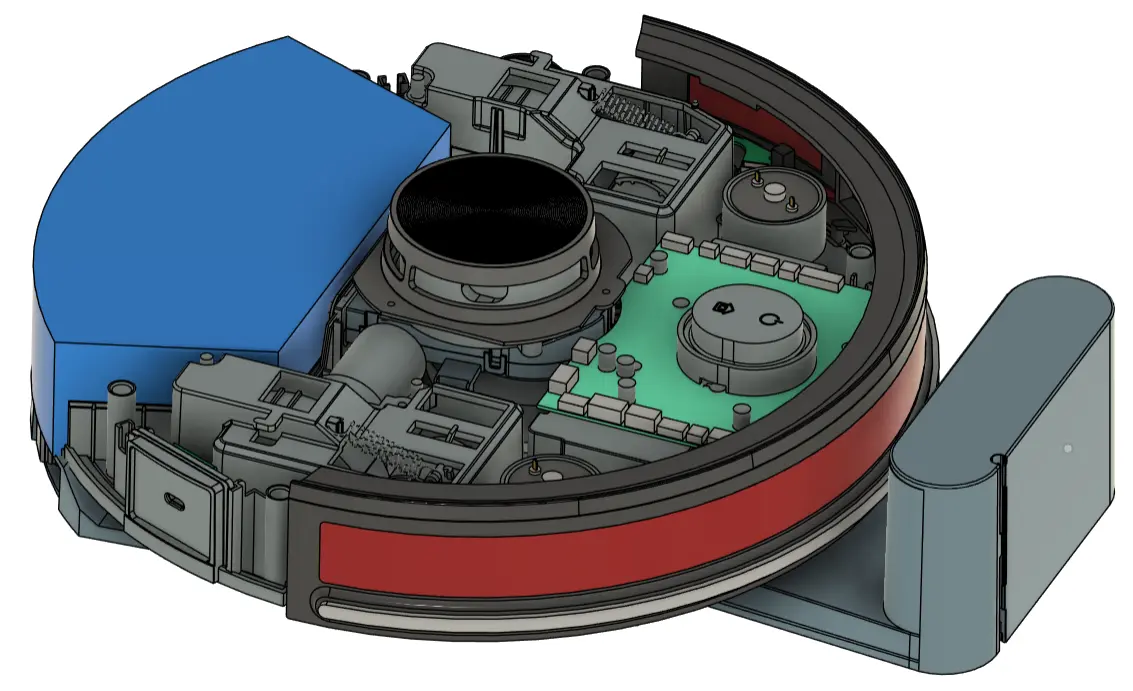
OOMWOO is organized so the community can build it in parallel. The robot and its software are split into self-contained modules (also known as Requests for Contributions). You pick whatever module interests you, work on it whenever you want, and submit your work as a pull request. Multiple people can tackle the same module — the best solution surfaces over time.
Please find the list of Requests-for-Contribution (RFC) here. Here are a few RFC examples:
- Create 3D STEP models of sourced parts — drive wheel assemblies, caster wheel assembly, fans, main brushes and so on
- Map-and-clean — code to perform the first clean while mapping while SLAM-mapping and exploring
- Research specs of sourced parts — many sourced parts lack datasheets, so their specs and electrical interfaces have to be researched and sometimes reverse-engineered
Here is OOMWOO’s main GitHub repo where 3D files will be published.
Follow along
I’ll be sharing progress as they happen:
- GitHub: github.com/makerspet/oomwoo — code, docs, and discussions
- Discord: join the build chat — twice-a-week updates in #general
- YouTube: build-in-public channel
- X: @0OMWO0 — I will be setting it up by mid-July.
Follow OOMWOO build
Open-source robot vacuum community build updates
Parts Kit
Everything about OOMWOO stays open — you can source every part yourself. If you’d rather skip the parts hunt, a convenience kit (motors, PCB, brushes, gaskets, LiDAR) will be available here at Maker’s Pet, from the same maker behind this project. The kit is a convenience, never a requirement.


Would like to know how much would the purchase cost for the parts for this project ?, thank you.
Hi Ruben, I’m researching sourced parts and should have a ballpark cost estimate in a week or so. That said, the target budget is $100~$200 + Raspberry Pi 5 4Gb to build a mid-range $500-$600 vacuum. This includes a mid-range suction module, rotating mops, obstacle avoidance with color + distance cameras.
Here is a living list of modules + which to source vs 3D print https://github.com/makerspet/oomwoo/blob/main/docs/design-document.md . I appreciate your input!
Opinion: Reduce your use of LLMs in the design documents, it destroys any trust in entire project for a range of people like me.
This is purely a personal opinion.
Beyond that, really cool project. Wish you all the best.
Noted, thanks.
I don’t want to start a lengthy discussion that does not belong here, but I have built a complex hardware/software project myself with the help of Claude.
Depending on the model it took a lot of critical evaluation, but less so with more recent Anthropic models. And the end result is very good.
Coming from software, my prior knowledge of mechanics and electronics was near non-existent.
Hi Bob, LLM use – it took a while to think over. LLM amplifies my productivity 10x or more. But I’ll keep in mind about reducing LLM public-facing use.
For example, initially I set up an OpenClaw 24/7 Discord concierge to greet the community, give orientations and keep server users up-to-date. But I ended up disabling it after a couple of days – because its messages looked like slop (I used Claude Sonnet) and someone immediately tried to prompt-inject it.
I just like to let you know that your use of LLMs in the design documents signals to me that you’re a person who knows how to leverage the tools available to them to get the most done possible in the time available.
This is just a personal opinion but it definitely influences my perspective on this project and I will be following.
This is fantastic! Out of curiosity, given the high availability of cheap spare parts on sites like eBay or AliExpress for Chinese-branded vacuums, was it considered to perhaps piggyback on those for more complex parts?
Hi David, reusing AliExpress Chinese parts – yes, absolutely. This is exactly the plan – source off AliExpress motors, sensors, vacuum assembly. 3D print enclosure, bumper, brackets, dock.
Here is the living source vs. 3D print document with BoM https://github.com/makerspet/oomwoo/blob/main/docs/design-document.md
No increase the use of LLMs. Don’t waste your time on trivial things.
Cool idea. Subscribed
Could an older rpi 3b+ work?
Hi Shayne, LiDAR mapping will need 4GB RAM minimum at first. Raspberry Pi 3B+ 1GB might be too tight for first release.
That said, I’ve seen plenty of vacuums running with less than 1GB RAM. So, the answer is “yes, but not in first release”.
Is there any reason I cant use an existing vac as the base? Just scrap the onboard pcb but use everything else I can?
I’ll try making a version to retrofit existing vacuums – likely by mounting a Raspberry Pi, a LiDAR, and I/O board (replacing the internal/original PCB).
That said, here are the difficulties:
1) the internal PCB likely has docking IR sensors built in. So, removing the internal PCB can break docking. Same for bumper IR sensors, camera.
This can be worked around, say, by making a simple placeholder PCB to replace the original.
2) There are so many consumer vacuum cleaner models out there.
So, The I/O board will have to take care to support the many different motors, voltages, sensors.
But I think retrofitting is mostly doable, if laborious.
Could it be designed so, that it would be possible optionally to have emptying dock in later phase, preferably bagless? Something similar my current roborock S7 maxV+ ? It empties the robot’s bin through the same channel it vacuums floors but in reverse direction.
Self-emptying dock – yes, absolutely. Roborock S7 maxV+ style auto-empty – I’ll look into this closely. I think it’s doable technically.
Awesone
This is exactly what I was looking for last months/years. I can barely help you with this project, but I will keep my finger crossed. Great project!
Since Roomba was bought out by one of the antrichrist companies, roomba no longer works. Is it possible to buy the software to download locally to run something like a roomba and forego the antichrist company completely? Thanks.
Hello, I thought Roombas kept working after the iRobot bankruptcy. I’ve just tried Googling that and Google says so as well.
I don’t have a Roomba myself and I don’t quite know about its software for download. But why don’t you try asking your question on Reddit in the vacuum cleaners group? https://reddit.com/r/VacuumCleaners
Super excited to follow this! Don’t know if you’ve seen this project: https://valetudo.cloud/ but it may have some helpful bits it’s done built off reverse engineering other robot vacuums via 0 days.
Hi thebeae, thanks for the pointer. I’m a big fan of Valetudo, robotinfo.dev and Dennis Giese. I’ve hacked and installed Valetudo on my Dreame (and it works well).
What license is this intended to be released under? Will commercial use be allowed?
Hi Eli, it is released under Apache 2.0 license.
Is commercial use allowed – yes, you can freely use, modify, distribute including for profit.
I’d like/hope this project to be used as widely as possible.
Why?
Cost to the end user – having a large number of users would allow sourcing parts in wholesale volume, at a fraction of the retail parts pricing – and bring down the cost to the end user.
Innovation – some kinds of innovation are possible only with a large following. For example, consumer vacuum robots (by and large) don’t have apps. Personally, I’d love to extend vacuum functionality with apps – say, make my vacuum patrol the house, check all doors are shut, the water filter in the kitchen is not leaking on the floor and the cat has’t toppled the flower vase onto the floor (while I’m away from home). Developers would be happy to make helpful, entertaining apps – but only when there are plenty of (paying) users available to purchase apps.
That was probably the plan, but you should print the logo in capital letters because then it says the same thing when read upside down. [OOMWOO]
All capital letters – sounds good! Yes, it was picked to read same upside down – for a bit of character and fun.
Hey! Incredible project!
Just of curiosity… do you have the final projected cost of the overall project?
What it would be compared to similar Robot Vacuum of the market?
Regards
Bruno
Hi Bruno, not final BoM. I should have a rough BoM mid-July and a final one end of August.
The BoM is here (a placeholder for now) https://github.com/makerspet/oomwoo/blob/main/BOM.md
The goal is to build a mid-tier vacuum, say $600 for $200 in parts plus bring-your-own Raspberry Pi 4/5.
great
I can’t help you directly with this project because I don’t have the necessary skills, but the open-source community has been waiting for a solid project like this for a very long time.2 3To help you, here are a couple of websites that might interest you or prove useful:4 5https://wolley.se/6https://github.com/awesome-vacuum/awesome-vacuum7 8Good luck with the project! It’s very ambitious, but also incredibly exciting and valuable for digital independence from the major brands.
I can’t help you directly with this project because I don’t have the necessary skills, but the open-source community has been waiting for a solid project like this for a very long time.
To support your work, I would like to share a couple of resources that might be useful or inspiring:
https://wolley.se/
https://github.com/awesome-vacuum/awesome-vacuum
Good luck with this project! It’s certainly ambitious, but it’s also an incredibly exciting and worthwhile endeavor. A truly open and well-designed robot vacuum platform could make a real difference for digital independence, user freedom, and reducing reliance on the major brands. I sincerely hope your project succeeds and gains the community support it deserves.
Pepe, no worries and thank you for the links! I’m looking at Wolley now.
[…] Pet has launched oomwoo, an open-source robot vacuum that owners build themselves. The robot works by mapping the home with […]
[…] Pet has launched oomwoo, an open-source robot vacuum that owners build themselves. The robot works by mapping the home with […]
[…] lansat proiectul oomwoo, un robot aspirator open-source pe care proprietarii îl construiesc singuri. Robotul […]
Why Rpi 5? I believe Rpi Zero 2W could do it. Also old Android phone could do, if damn Google make unpossible for root them.
Hi Veijo, you are right, a Raspberry Pi Zero 2W can control a robot vacuum cleaner with LiDAR.
For example, Roborock S5 uses an Allwinner R16 CPU with 4x ARM Cortex-A7 cores clocked up to 1.2GHz with 512MB RAM and 4GB eMMC.
Compared to that, Raspberry Pi Zero 2W uses 4x 64-bit ARM Cortex-A53 cores, 512MB of RAM and an SD card.
Grossly simplifying, both look like same class of performance.
That said, there are two problems.
1. The software – Roborock robot firmware is closed source, we cannot reuse it. I have to reuse (or make) an open-source to do LiDAR mapping, navigation, robot control.
The only open-source robot software available today that’s popular, well-supported, works out-of-the-box and can be deployed relatively quickly is Robot Operating System verion 2 (ROS 2) . This software requires 4GB RAM minimum and a Raspberry Pi 4 caliber board or better.
2. Good obstacle avoidance – robot vacuum cleaners with good obstacle avoidance use camera to recognize and avoid obstacles. Often, two 1080p color cameras are used for stereo vision. Sometimes IR cameras are used with a lesser resolution. Often an additional 3D distance camera is used in addition to everything else.
I think Raspberry Pi Zero 2W would struggle with real-time camera processing. I think Raspberry Pi 4/5 would struggle too, but less.
As a side note, vacuums with a less advanced obstacle avoidance use a line laser sensor in the front. A line laser sensor does not need any computation-intensive processing.
So, how vacuum cleaner robot makers deal with these two problems?
To the best of my knowledge, a decade ago robotics software manufacturers took the open-source Robot Operating System (version 1 back then) including the open-source Google Cartographer mapping suite, stripped those down to fit 512MB RAM and run on quad-core ARM CPUs and made the source proprietary.
Manufacturers have done such a good job optimizing ROS that, for example, this LiDAR-enabled robot vacuum runs on Allwinner F1C200s with 4x ARM Cortex-A7 1.2GHz cores, a mere 64MB in-package RAM and still performs LiDAR mapping and navigation.
As far as the obstacle avoidance and real-time object recognition, consumer robot vacuum manufacturers use ARM-based CPUs that have on-chip ML/AI inference accelerators. For example, Ecovacs X5 Omni uses a Rockchip RK3562 with 4x A53 CPU cores clocked up to 2GHz, 512MB RAM and 8GB eMMC – with a 1 TOPS AI/ML on-chip accelerator.
I may be wrong, but to make the project progress quickly we should use a Raspberry Pi 4/5 for its first version – to run the open-source ROS2. After that, we can optimize ROS2 to run on (much) cheaper single-board computer boards.
How does that sound?
Have you thought about using the WaveShare
https://www.waveshare.com
RP2040-Zero – Waveshare Wiki Pico zero as it does have a SD card slot?
Hi StormLeopard, I love RP2040 and have programmed it for other projects (including PIO). Vacuum cleaners do need an I/O micro-controller.
That said, vacuum cleaners need lots and lots of GPIO for motors and sensors. RP2040-Zero only has a few.
The I/O board for OOMWOO is going to be a custom PCB built (tentatively) around STM32G070RBT6 with 59 GPIOs, 64MHz, 128KB flash, 32KB SRAM, 2V-3.6V, 12bit ADC. Even than number of GPIOs may not be enough – I’ll have to double check.
Have you considered chaining a number of IO expanders on a i2c bus? Could use sx1509 (16 out) or NXP PCA9698 (40 out), They’re quite cheap and you can have multiple on the same bus, then if you run out of IO just chain in another one.
If you had space for three pca9698 that’s 120 IO, which should be enough for anyone, don’t have to populate all slots. If you want interrupts, then that’s just three interupt lines to deal with. Yes you lose a tiny bit of latency, but it’s not going to matter for this application. Could also stick with the STM, but have some sx1509 slots for banks of 16 extra if needed.
Another option would be each module has one i2c bus and power, and you connect them centrally, but at that point you might as well go for CAN or something.
PCA9698 GPIO expander datasheet with 40 GPIO looks good. I’d consider using it, but I’ve just looked up its pricing.
PCA9698 costs ~$5.40 at 100+ pieces at JLCPCB compared to STM32G070RBT6 ~$1. SX1509 costs ~$3.15
About the GPIO count, I’ll get back to you with a concrete GPIO budget estimate.
The only real feedback you’d need from the motors would be the quadrature encoders on the wheel motors; suction and brush motors are just on/off (or simple PWM). Drive them with something like a DRV8833. An RP2040 or dedicated quadrature counter IC decodes the encoder pulses and feeds position counts back to the Pi over I2C or UART. I’m not convinced you actually need the STM.
Hi Penny, here is a rough vacuum GPIO budget. This applies to an entry level vacuum model. Advanced models need more GPIO.
1. Power source current sense (analog in)
2. VBat sense (analog in)
3. Main fan sense (analog in)
4. anti-fall left up sensor (analog in because IR sensors are analog)
5. anti-fall left down sensor (analog in)
6. anti-fall right up sensor (analog in)
7. anti-fall right down sensor (analog in)
8. wheel motor left driver in1 (digital output)
9. wheel motor left driver in2 (digital output)
10. wheel motor left driver encoder (digital input)
11. wheel motor right driver encoder (digital input)
12. Power button (digital input)
13. CPU (e.g. Raspberry Pi) power on/off (digital output)
14. STM32 SWDIO
15. STM32 SWCLK
16. Vacuum power on/off (digital output)
17. Wheel motor right current sense (analog in)
18. Wheel motor left current sense (analog in)
19. Main brush motor current sense (analog in)
20. IMU SPI SCLK (digital out)
21. IMU SPI MISO
22. IMU SPI MOSI
23. IMU SPI CS
24. Wheel motor right driver in1 (digital out)
25. Motors power enable (digital out)
26. Wheel motor right driver in2 (digital out)
27. Water pump sense (analog in)
28. Side brush left front motor sense (analog in)
29. Side brush right front motor sense (analog in)
30. CPU reset (e.g. Raspberry Pi)
31. Dock IR sensor 1 (analog in)
32. Dock IR sensor 2 (analog in)
33. Water pump motor PWM (digital out)
34. Main brush motor PWM (digital out)
35. Lidar motor PWM (digital out)
36. Bumper switch 1 (digital in)
37. UART1 TX
38. UART RX
39. Side brush motor right PWM (digital out)
40. Side brush motor left PWM (digital out)
41. Power LED on/off (digital out)
42. Home LED on/off (digital out)
43. Home button (digital in)
44. Battery charge sense (digital in)
45. Charge status (digital out)
46. Bumper switch 1 (digital in)
47. Bumper switch 2 (digital in)
48. Test/program
49. Test/program
50. Main fan motor PWM (digital out)
51. Main fan motor current sense (analog in)
52. IMU interrupt 2 (digital in)
53. IMU interrupt 1 (digital in)
54. IMU FSYNC (digital in)
55. Side proximity IR sensor left (analog in)
56. Side proximity IR sensor right (analog in)
57. Side proximity IR LED left PWM (digital out)
58. Side proximity IR LED right PWM (digital out)
59. Wheel drop sensor left (digital in)
60. Wheel drop sensor right (digital in)
Great project, I’ve been looking for a way to revive my old robo vac after it broke and the company said I’d have to pay basically the cost of a new vacuum to get it fixed. DIY is definitely the way to go.
I wonder if an optional “sweeper” mode could be implemented: No suction, just keep pushing debris ahead of it. Dust bunnies when you have pets becomes an issue, and rather than having the rotor get tangled with fur, just sweeping stuff to a central place sometimes it’s easier. After clearing dust bunnies myself, my robo vac could handle the dust and stuff left behind.
Related: Strong request for easily removable wheels and rotor without needing to disassemble the whole thing. Dealing with tangled fur slowing/stopping the wheels and brush is already a pain, I don’t want to have to spend half an hour disassembling and reassembling it.
Hi Feynt, custom “sweeper” mode – yes, that will be possible. I’ll make operation (including cleaning modes) extensible with apps.
Would love to see additional feature: tangled hair cutting. It is a real issue with this type of vacuum.
Hi Temple, tangled hair cutting – this is my personal pain point as well. I’ve got a Spitz dog and a cat, both long-haired.
Yes, tangled hair cutting is high on the TODO list. I’m sourcing the main brush right now.
To set expectations, I can’t promise 100% having it in the very first model, but ASAP after that!
Hi
Would it be possible to use an ESP instead of a Raspberry Pi, with a Mini PC on your local network doing all the hard work?
Hi Jordi, using ESP32 instead of Raspberry Pi – yes!
This would remove the cost of Raspberry Pi, increase battery life, but require an additional mini PC (that will run the bulk of the robot software), a very good local WiFi connection and may not have enough bandwidth for any sort of video (obstacle avoidance) streaming.
I’ve done this before with another little home robot. Here is how it can work. I’m including a ESP32 on the OOMWOO I/O board (that controls all motors, sensors). The I/O board connects to Raspberry Pi, but Rpi is optional.
I’d like to call this vacuum version “educational” because the additional requirement (to set up the additional mini PC) is not for the regular user.
[…] Billet de lancement, Maker’s Pet : contexte du lancement et calendrier de la nomenclature communiqué par le créateur. […]
I love this! I suggested something like this on Facebook to a maker. Not sure if it was this one, though.
The idea of open-source hardware and software is exciting. Endless repairability and customization.
I have shedding dogs … so much fur. It would be amazing if the resevoir for vaccuumed debris is large to accommodate all the fluff. But also, auto-emptying at the docking station, ideally bagless, and large enough so the robot could vacuum the whole area before needing emptying. Will there be an option to easily upgrade the motor/vacuum power?
Hi Ana, I’ve got a Spitz and a cat, both long haired, shedding fluff all over the place like furry baseball balls. This is my (and my wife’s) personal pain point.
A large debris reservoir, auto-emptying, ideally bagless, large enough to vacuum in one go – noted, thank you! I want OOMWOO to clean very well, including pets.
To set expectations, I’m aiming to make the 1st vacuum version clean well. But making cleaning really well is likely to get done in a follow-up version (because there is so much work making the 1st vacuum version).
Great project! Robot vacuums that get lost, can’t find their charging station, or have issues climbing thresholds usually get chunked out the back door onto the patio. LOL A good design that can be tweaked and easily fixed sounds fantastic. I’m all in! 🙂