Free worldwide shiping on $150+
Tutorial: Publish Your 2D LiDAR to ROS 2 on a Raspberry Pi
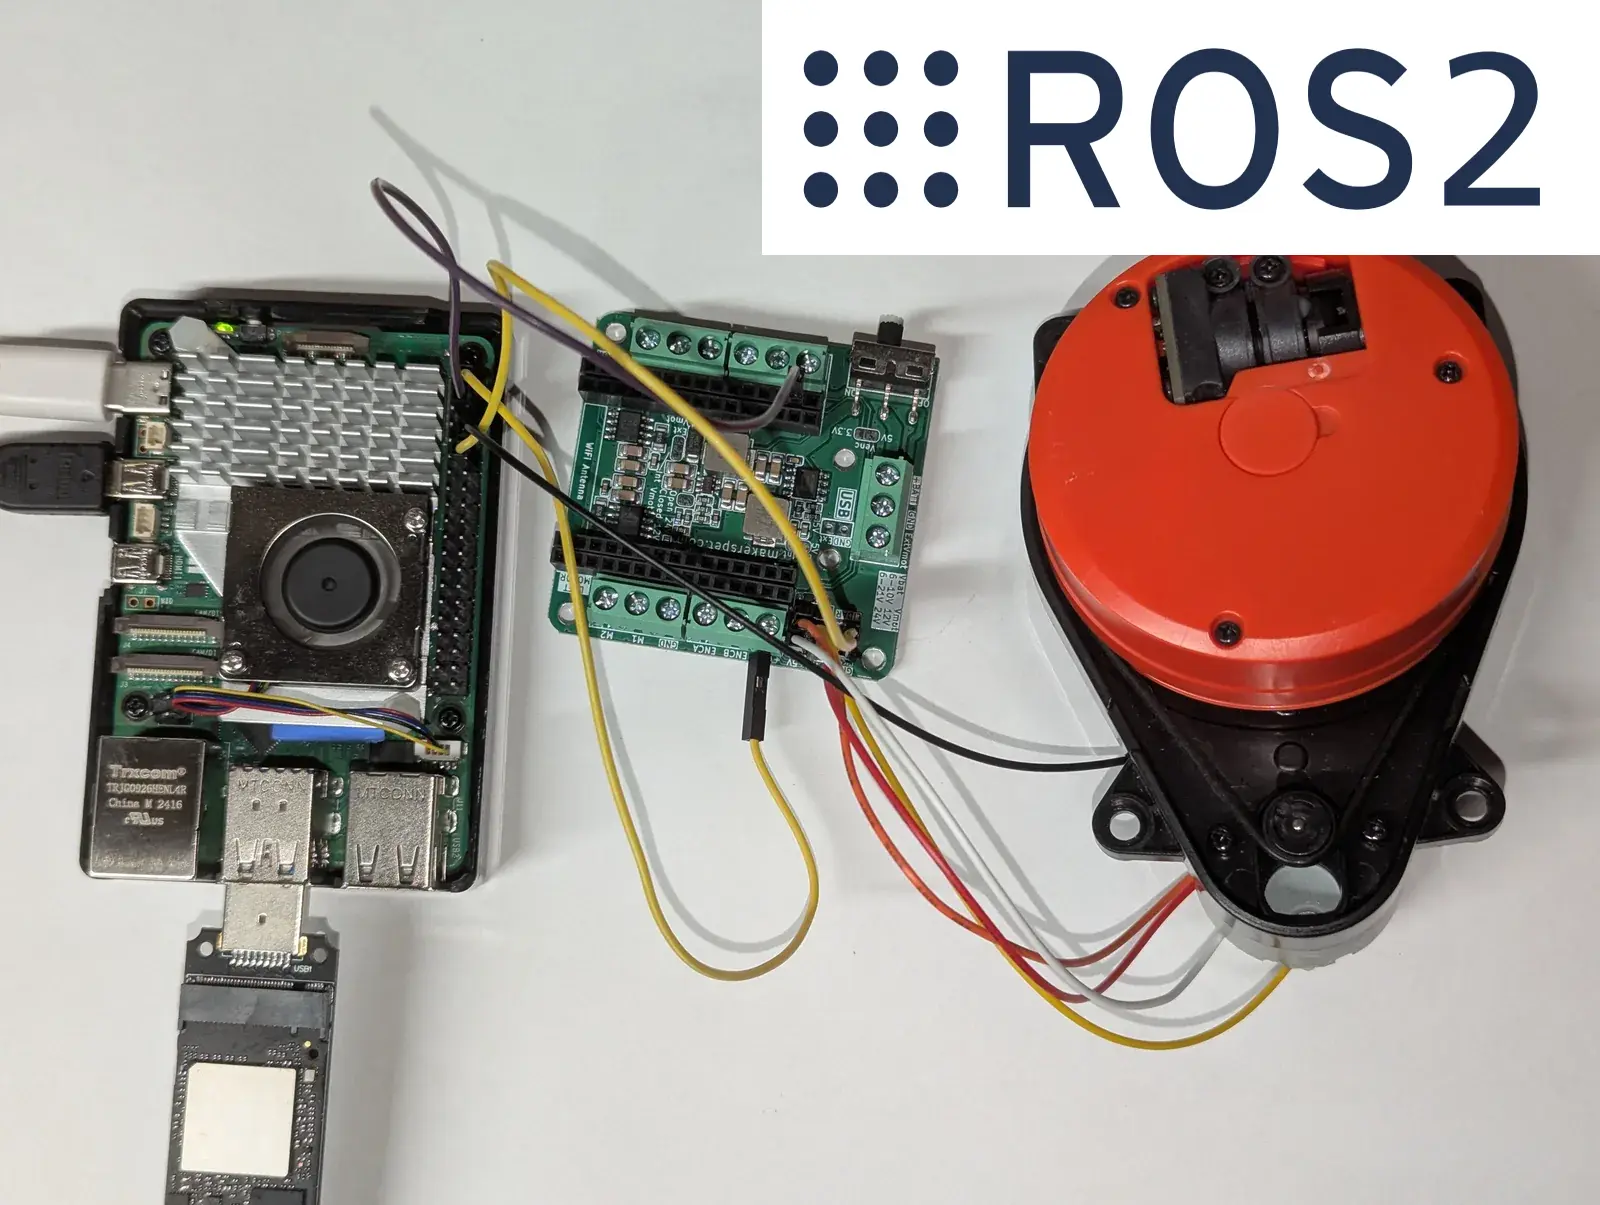
Publish the LDROBOT LD14P, Xiaomi LDS02RR, or 3irobotix Delta-2A to a ROS 2 /scan topic straight from a Raspberry Pi 5 — no microcontroller, and ROS 2 runs in a container. A C++ LaserScan driver built on kaiaai/LDS.
Across this series we connected three different 2D LiDARs to a Raspberry Pi in pure Python — the LDROBOT LD14P (read data, drive its motor, and plot it in a browser), the Xiaomi LDS02RR, and the 3irobotix Delta-2A. Great for learning — but if you want to do real robotics (mapping, navigation, SLAM) you need that scan data on a standard ROS 2 topic.
In this tutorial we publish any of those three LiDARs to ROS 2 as a sensor_msgs/LaserScan on the /scan topic, straight from a Raspberry Pi 5 — no Arduino or ESP32 in the middle, and without even installing ROS 2 on the Pi (we run it in a container). The result is a small open-source package: kaiaai/lds_ros2.
What we’re building
lds_ros2 is a single C++ ROS 2 node, lds_node, that:
- reads the LiDAR’s scan packets from a serial port,
- decodes them into points (angle, distance, signal strength),
- bins one full rotation into a
LaserScanmessage and publishes it on/scan, and - runs the motor — the job the on-robot microcontroller normally does — so a bare Pi can drive these LiDARs directly.
We didn’t write the packet parsers from scratch. They are the same battle-tested decoders from the kaiaai/LDS library that the kaiaai_telemetry package already uses in production — there, the LiDAR bytes arrive embedded in a Wi-Fi telemetry stream from an ESP32 robot running micro-ROS. Here we feed those same decoders bytes from a serial port instead, and reuse the identical LaserScan assembly. It’s also the ROS 2 companion to the lds2d Python library from the earlier posts.
| LiDAR | Motor | Baud | Notes |
|---|---|---|---|
| LDROBOT LD14P | self-spinning; speed set over UART | 230400 | command-driven motor |
| Xiaomi LDS02RR | host-driven: the Pi spins it (GPIO PWM + PID) | 115200 | Neato XV11 family |
| 3irobotix Delta-2A | host-driven (GPIO PWM + PID) | 115200 | 230400 variant supported too |
How the motor is handled
This is the one tricky bit. The LD14P spins on its own — you just send it start/stop/speed command frames over the same UART that carries the data. The LDS02RR and Delta-2A have no onboard speed controller: they only stream data while something spins them at the right rate. On a robot that “something” is the ESP32 driver board; on a bare Pi, the node does it, driving the adapter’s MOT_EN pin with a software PWM and a PID loop that holds the target rotation rate (the same hardware-verified gains as lds2d).
Because the scan data comes in over the serial RX line and the motor PWM goes out on a separate GPIO pin, reading and spinning happen in one process with no conflict.
Wiring recap
The wiring is exactly as in the earlier posts. For the LD14P (3.3 V logic, no level shifter):
| LiDAR wire | Pi pin | GPIO | For |
|---|---|---|---|
| 5V | pin 2 or 4 | — | power |
| GND | pin 6 | — | power |
| TX | pin 10 | GPIO15 / RXD | scan data |
| RX | pin 8 | GPIO14 / TXD | motor commands |
The LDS02RR and Delta-2A use the Maker’s Pet adapter: LiDAR TX → Pi GPIO15 / pin 10 (data) and MOT_EN → Pi GPIO18 / pin 12 (the PWM that spins the motor), plus 5 V and GND. See the per-LiDAR tutorials linked above for photos.
Get new tutorials by email
Step 1 — Free the Pi’s GPIO UART
As in Part 1, free the serial port from the boot console (full details there). In short, on Raspberry Pi OS:
# /boot/firmware/config.txt  → add:
enable_uart=1
dtparam=uart0=on
# /boot/firmware/cmdline.txt → remove:  console=serial0,115200
sudo systemctl disable --now [email protected]
sudo usermod -aG dialout,gpio $USER
sudo reboot
The GPIO UART is then /dev/ttyAMA0 (usually also /dev/serial0). The gpio group lets us drive the motor PWM without root.
Step 2 — Install Podman
We don’t install ROS 2 on the Pi at all — it runs inside a container, which keeps the host clean and makes the setup reproducible. We’ll use rootless Podman (Docker works too):
sudo apt update && sudo apt install -y podmanStep 3 — Build the package
Clone the repo, build the ROS 2 Jazzy image once, then compile the workspace:
git clone https://github.com/kaiaai/lds_ros2 ~/lds_ros2
cd ~/lds_ros2

./docker/build.sh            # build the ROS 2 Jazzy image (one time)
./docker/run.sh colcon build # compile lds_ros2
The image is based on ros:jazzy and also includes lgpio (for the motor PWM) and RViz. docker/run.sh passes the Pi’s serial port and GPIO chip into the container and, under Podman, keeps your dialout/gpio group membership so the node can open them.
Step 4 — Run the LD14P and see the scan
./docker/run.sh bash -lc \
  'source install/setup.bash && \
   ros2 launch lds_ros2 lds.launch.py params:=ld14p.yaml'
In another shell, confirm data is flowing:
./docker/run.sh bash -lc 'source install/setup.bash && ros2 topic hz /scan'
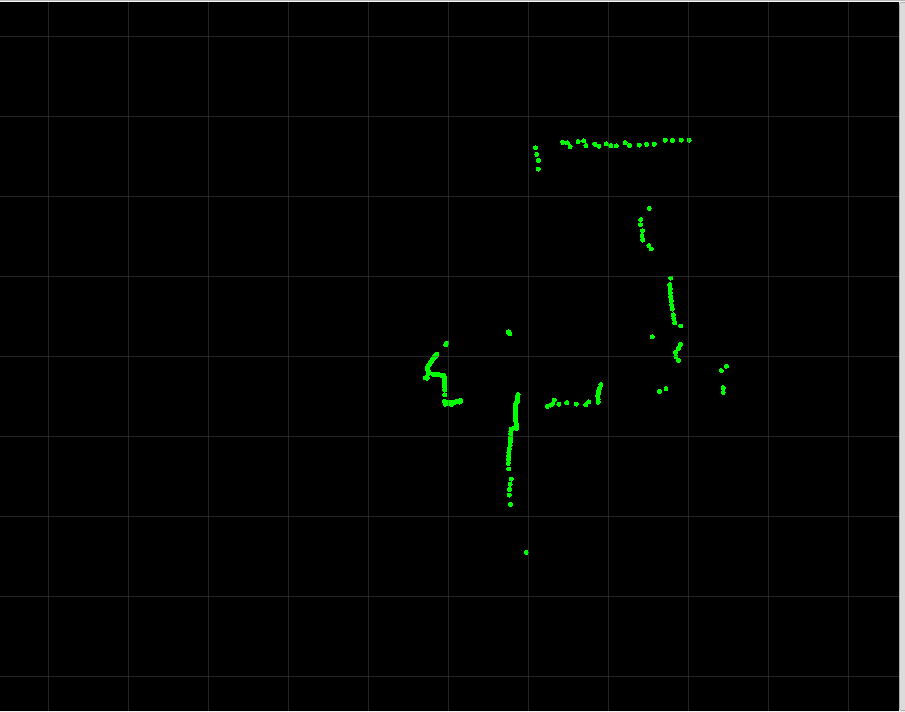
# ~6 Hz for the LD14PTo watch it as a radar, run RViz2 on a desktop on the same network (set Fixed Frame to laser and add a LaserScan display on /scan), or on the Pi if it has a display attached.
How LiDARs are used in self-driving robots?
Build a real LiDAR self-driving Arduino/ROS2 robot using our kit - with complete step-by-step instructions. No robotics experience necessary.
See the full robot kit →Step 5 — The LDS02RR and Delta-2A
Same command, different parameter file. These two need the GPIO chip passed through (the node spins the motor):
# Xiaomi LDS02RR (~5 Hz)
./docker/run.sh bash -lc \
  'source install/setup.bash && \
   ros2 launch lds_ros2 lds.launch.py params:=lds02rr.yaml'

# 3irobotix Delta-2A (~6 Hz)
./docker/run.sh bash -lc \
  'source install/setup.bash && \
   ros2 launch lds_ros2 lds.launch.py params:=delta_2a.yaml'
If your serial device or GPIO chip differs, override them: SERIAL_DEV=/dev/ttyUSB0 GPIOCHIP=/dev/gpiochip4 ./docker/run.sh .... (On some Pi 5 kernels the 40-pin header is gpiochip4 rather than gpiochip0 — check with ls /dev/gpiochip*.)
Tuning it for your robot
Each LiDAR ships with a config/*.yaml file holding sensible defaults. The parameters you’ll reach for most:
| Parameter | What it does |
|---|---|
frame_id, topic | the LaserScan frame and topic (default laser, scan) |
scan_size | bins per rotation — the angular resolution of the published scan |
angle_offset_deg, clockwise | orient the scan to your robot (flip clockwise if RViz mirrors it) |
range_min, range_max | clamp the reported range, in meters |
mask_radius | drop returns closer than this — hides the robot’s own body |
motor.scan_freq | target rotation rate (Hz) |
motor.pwm_gpio, motor.kp/ki/kd | host-driven motor pin and PID gains (LDS02RR / Delta-2A) |
Tested on a Raspberry Pi 5
I ran this end to end on a Raspberry Pi 5 with a real 3irobotix Delta-2A — ROS 2 Jazzy in rootless Podman, exactly the steps above. The package builds, and the node publishes /scan at a rock-steady 6.0 Hz (standard deviation under 0.5 ms): the on-host PWM + PID holds the Delta-2A right at its target rate, no microcontroller involved. A representative rotation carried 227 valid returns across the 720 bins, ranging from about 0.15 m to 4.1 m — sane indoor readings. On Ctrl-C the node switches the motor off cleanly.
One gotcha worth flagging if you build something similar: with the lgpio library, setting a PWM duty of 0 only stops the waveform and can leave the pin latched high — i.e. motor full-on. The driver explicitly drives the motor-enable pin low before releasing it on shutdown, so Ctrl-C really does stop the motor.
The packet decoders and the LD14P motor command frames are also covered by a hardware-free unit test (colcon test), and are the same decoders kaiaai_telemetry runs in production. The LD14P and LDS02RR motor paths are structurally identical to the Delta-2A’s but haven’t been bench-tested here yet; their host-driven PID gains come straight from the hardware-verified lds2d values, so verify and tune motor.* on your own unit if needed.
Wrapping up
With one small package, all three LiDARs now show up as a standard ROS 2 /scan — ready for slam_toolbox, Nav2, or your own nodes. Because the parser is just one header per model, adding another LiDAR from the LDS family is mostly a copy-paste away.
Grab the code at github.com/kaiaai/lds_ros2, and if you prefer Python, the same LiDARs are covered by lds2d. The LiDARs and the Raspberry Pi adapters are available at makerspet.com.