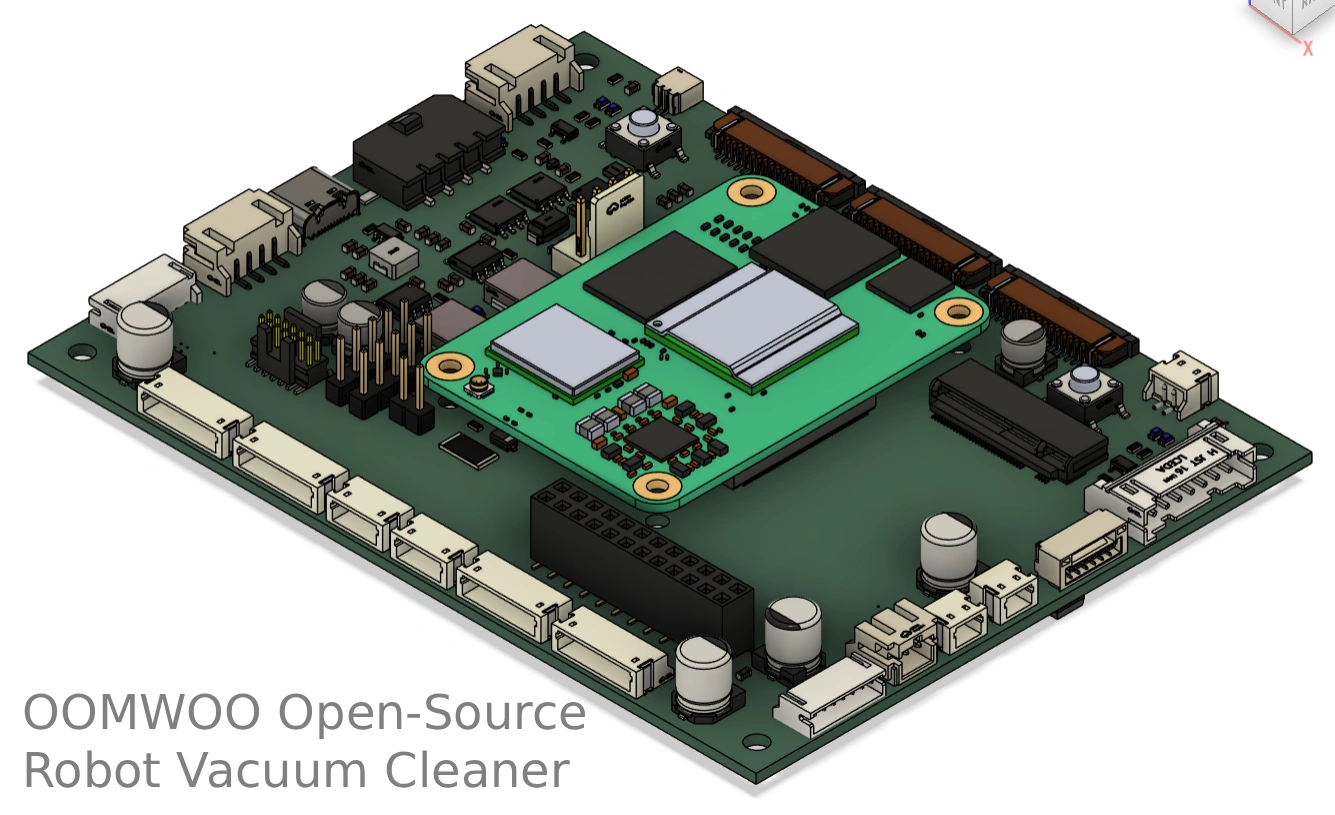
OOMWOO PCBs – what we are building, how and why
A module-by-module tour of the OOMWOO robot vacuum main board: compute, real-time control, power, fail-safe design, motors, sensors, audio and how we pick parts.

OOMWOO is our open-source robot vacuum that you build yourself. This post walks through its main circuit board module by module: what each part does, how we built it, and why we chose it. The board is still at the schematic stage. Layout comes next, so everything here can still change, and we would like your feedback before it does.
Update, October 27, 2026: the first board now uses a smartphone instead of a Raspberry Pi as the compute. See First board: a phone as the compute. The Pi board is still planned.
All the design files are KiCad, Apache-2.0, in the oomwoo-pcb repository. Parts, pinouts and measurements we collect along the way live in SPEC.md.
First board: a phone as the compute
To build and test sooner, we are keeping the first board as simple as we can. An Android phone is the compute: it does mapping, navigation and the app, and talks to the STM32 over USB-C. The Raspberry Pi carrier is still in the plans, as the next board. The rest of this post covers both and marks what only the Pi board has.
- Left out of the first board: the Compute Module, M.2 slot, SD card, camera, speaker amplifier, water pump and mopping, and the board fan.
- The STM32 reads every sensor, including the LiDAR and the front time-of-flight sensors, timestamps everything on one clock and forwards it to the phone over USB. A two-way time exchange maps those timestamps to the phone’s clock.
- USB-C: the phone is the USB host. The STM32’s built-in USB-C controller handles the CC pins, so it can ask the phone to swap power roles and charge it while the phone stays host. Phones that refuse alternate between charging and data.
- Schematic: kicad/main-phone, a fork of the Pi board.
The big picture: two brains
Commercial robot vacuums split the work between an application processor and a microcontroller, and so do we. The processor thinks; the microcontroller keeps the robot safe and on time.
| Module | Its job | Main parts |
|---|---|---|
| Compute | Mapping, navigation, cameras, Wi-Fi, the app | Android phone over USB-C (first board); Raspberry Pi Compute Module 5 later (CM4 also supported) |
| Real-time controller | Motors, sensors, power switching, safety | STM32G473VCT6 |
| Power | Battery charging and all supply rails | SLM6900 charger, AP64501 bucks, MT3608 boost |
| Safety | Cuts actuator power if firmware hangs | RC charge-pump watchdog, gated rail switches |
| Motors | Wheels, brushes, fan; water pump on the Pi board | 4x DRV8870, fan and pump switches |
| Sensors | LiDAR, cliff, bumpers, carpet, IMU, docking IR | Connectors to sensor boards, ICM-42607-P, ITR9606 bumper sensors |
| Audio | Voice prompts | The phone’s speaker; NS4168 I2S amplifier on the Pi board |
Everything runs from a 4S lithium-ion pack (14.4 V nominal, 11.6 V empty, 16.8 V full). The motors take battery voltage directly, and the logic runs from regulated 5 V and 3.3 V.
Compute (Pi board): a Raspberry Pi Compute Module carrier
The Pi board is a carrier for a Raspberry Pi Compute Module. We picked a Compute Module over a full Pi because it is lower (the robot has to fit under furniture), a little cheaper, and many third-party modules share the pinout, including some with NPUs for camera-based obstacle detection.
- No camera of its own any more: the camera moved to the STM32, see Sensors.
- An M.2 slot with its own 3.3 V buck that the Compute Module switches on, to experiment with AI accelerators.
- An SD card slot with a power switch.
- A Linux serial console on a 0.1-inch 5-pin header, so the single USB port stays free (see Debug and flashing).
- An internal USB header for the optional microphone board, with a 0.5 A polyfuse and ESD protection.
- I2S audio out to the speaker amplifier.
Real-time controller: STM32G473
The STM32G473VCT6 (LQFP-100) owns every motor, sensor and power switch. It talks to the phone over USB on the first board, or to the Compute Module over a UART on the Pi board, with a simple custom protocol, not micro-ROS, to keep third-party code out of the safety path.
Why this chip: it has enough pins, timers and ADCs for all the motors and sensors, plus built-in op-amps that amplify the carpet sensor echo without an extra part. It also has a USB device port and a real-time clock. An 8 MHz crystal clocks it, and a 32.768 kHz crystal and a small backup regulator keep the clock running, so the board needs no separate RTC chip.
Power: battery, charger and rails
The robot charges from a 20 V brick, through the dock contacts or a low-profile barrel jack. Plugging in the barrel jack disconnects the dock contacts, so the two never fight. The dock only switches its contacts on after it sees the robot’s resistor signature, so a basic charging dock needs no microcontroller. Why 20 V: while charging, the board disconnects the battery and runs from the charger input through a diode, and the charger needs about 18.5 V to finish a 4S charge. An SLM6900 buck charger, set up for 4S, charges the pack at about 2.2 to 2.6 A. The battery thermistor is wired straight into the charger, so over-temperature protection works in hardware even if the firmware does not.
| Rail | Made by | Feeds | Switched by |
|---|---|---|---|
| BAT-VCC (11.6 to 16.8 V) | Battery | Everything below | Power button latch |
| VCC-3V3 | AP64501 buck | STM32 | Power button (POWER-EN) |
| VCC-3V3-REG | From VCC-3V3 | Sensors, IMU, motor driver logic | STM32 |
| VCC-5V-REG | AP64501 buck | LiDAR, phone USB-C, carpet boost; Compute Module and speaker on the Pi board | STM32 (5V_EN) |
| VCC3V3_M2 (Pi board) | AP64501 buck | M.2 slot | Compute Module |
| VUS (about 14.5 V) | MT3608 boost | Carpet sensor | Always on with 5 V |
| VM-VBAT | Battery via AO4407C | Wheels, brushes, fan | STM32 AND watchdog |
| VM-5V-LIDAR | 5 V via AO3401 | LiDAR, laser included | STM32 AND watchdog |
| VM-5V-WATER-PUMP (Pi board) | 5 V via AO3401 | Water pump | STM32 AND watchdog |
The carpet sensor gets its own boost rail because its echo amplitude tells carpet from hard floor. Running it from a battery that drifts between 11.6 and 16.8 V would make that comparison unreliable.
The power button
The power button only turns on the STM32’s supply. The firmware then holds the power on and turns on everything else, one rail at a time.
- A 3-second press turns the robot off. 3 seconds while holding Home is a factory reset.
- If the firmware hangs, holding the button for about 5 seconds turns the STM32 off in hardware: an RC timer and a Schmitt-trigger buffer override the firmware.
- While charging, the STM32 stays powered whatever happens, and plugging in the charger turns it on. The STM32 also measures the charger input, so it knows when it is docked.
- Charging itself runs in hardware and continues while the STM32 is in reset.
Safety: how the board fails safe
Our rule: if the firmware hangs, or the STM32 is being reset or reflashed, every motor, the pump and the LiDAR lose power. The board enforces this with passive parts and a few MOSFETs, and no watchdog chip.
The RC charge-pump watchdog
The STM32 toggles a pin (WDI) in software from its control loop. A capacitor passes only the edges of that signal to a P-channel MOSFET, and each edge tops up a hold capacitor. That capacitor voltage is WD_OK: about 2.7 V while the pin keeps toggling. If the pin sticks high, sticks low or floats, WD_OK falls below 1 V in about 100 ms. It also starts at 0 V at power-up, so nothing moves until the firmware is running.
- It must be toggled in software. A hardware timer or PWM would keep running after the CPU hangs.
- It uses only resistors, capacitors and a MOSFET that are already on the bill of materials.
Every actuator rail is WD_OK AND an enable pin
Each rail has a P-channel MOSFET switch. An N-channel MOSFET pulls its gate down only when WD_OK is high AND the STM32 drives its enable pin low. A 100k pull-up keeps each enable off while the STM32 is in reset or being flashed and its pins float. So the rail is on only while the firmware is alive and asks for it.
- The 14.4 V motor rail switches fast when it turns off, so a watchdog trip under full motor current does not cook the switch.
- The LiDAR rail soft-starts (about 1.5 ms) so it does not dip the 5 V that also powers the Compute Module. It cuts the whole LiDAR, not just its motor: a laser that keeps firing at one spot after its rotor stops is the unsafe case, whichever LiDAR you plug in.
- The pump rail has no soft start, so the pump can still be PWM-controlled.
Why we removed the watchdog chip
An earlier revision had an STWD100 watchdog that reset the STM32, plus an OR gate to disable it during debugging. Resetting the MCU does not by itself make the robot safe. Cutting actuator power does, and that is simpler. The STM32 still gets a reset path: its internal watchdog is forced on in hardware, and on the Pi board the Compute Module can pulse its reset line if the STM32 stops answering.
Motors and actuators
| Actuator | Driver | Connector | Notes |
|---|---|---|---|
| Drive wheels (x2) | DRV8870 each | JST ZH 7-pin | Hall encoder and wheel-drop switch in the same plug |
| Main brush | DRV8870 | JST ZH 2-pin | Up to about 7 A stall at 16.8 V (measured) |
| Side brush | DRV8870 | JST ZH 2-pin | |
| Suction fan | Fan has its own BLDC controller | JST PH 4-pin | Power, ground, PWM speed, FG tachometer |
| Water pump | AO3401 high-side switch | JST ZH 2-pin | 5 V peristaltic pump, current sensed by the STM32 (Pi board) |
Most motors are Roborock-compatible spares, so they are cheap and easy to find. SPEC.md has our bench measurements for each.
Sensors
- LiDAR: a JST GH socket for the LDROBOT LD14P, plus a right-angle 0.1-inch header (RX, GND, MOT-, 5 V) for connecting other 2D LiDARs with jumper wires. On the first board the STM32 reads the LiDAR and forwards the scans to the phone; on the Pi board they go straight to the Compute Module.
- Cliff and bumpers: a 16-pin JST PH connector compatible with iRobot Roomba 500 to 800 series sensor harnesses. The bumpers also have two ITR9606 slotted photo-interrupters on the main board, wired in parallel with the harness ones, so either can be used.
- Front sensor board: two VL53L7 multizone time-of-flight sensors, IR receivers for docking, an RGB camera and a white light for it (the camera is not on the first board).
- Side sensor boards: side proximity and docking IR.
- Carpet sensor: a 290 kHz ultrasonic piezo facing the floor. One MOSFET with a 330 ohm pull-up drives short bursts, and the STM32 op-amp and ADC read the echo. The drive pin is AC-coupled to the MOSFET, so a stuck pin cannot leave it on and overheat the pull-up.
- IMU: an ICM-42607-P on the main board.
- Buttons and LEDs: power, clean and home buttons with status LEDs.
Docking IR uses 38 kHz receivers with the NEC protocol. We picked the Everlight IRM-H638T over the usual TSOP38238: it costs about a third as much and JLCPCB stocks it in depth.
One RGB camera instead of stereo NIR
The plan was two NIR cameras for stereo depth, with homemade structured illumination. It is now a single RGB camera, pitched down so it sees the floor and obstacles ahead up to about the robot’s height – which also keeps it from looking around your home. Why:
- Color helps recognize objects, and the camera now has a second job: imaging the floor, to see what is clean and what is not.
- NIR modules cost more and come in fewer varieties and lenses. Only the OV5647 stands out as affordable with a wide-angle lens.
- Both need a light. An NIR one is invisible, which is nicer, but white is fine – my Dreame L60 Ultra PE and Roomba j7 both use white.
- Depth is already covered. Two VL53L7 multizone time-of-flight sensors, each covering about 63°, see about 126° ahead for detecting obstacles. The camera adds recognizing them.
- It has to work with a phone. OOMWOO will support an old smartphone instead of a Raspberry Pi as the compute. A MIPI camera suits a Pi but not a phone, so the plan is a low-bandwidth parallel-interface camera read through the STM32, which works with either. That also rules out heavier options: full time-of-flight cameras, stereo depth and structured light.
Why image the floor at all? My Dreame L60 Ultra PE goes through the motions mopping my kitchen tile. It picks up some dirt, but moves the rest around – into neat columns, since it mops in straight lines – and the tough spots stay. Running it three times in a row did not change that. A camera that sees the floor is how a robot can tell whether it actually cleaned.
Audio and microphones
The first board has no speaker; the phone’s is good enough. On the Pi board, an NS4168 class-D amplifier takes I2S straight from the Compute Module and drives the speaker. It is a MAX98357A equivalent at about half the price, and in an ESOP-8 package you can solder by hand. It needs no master clock (the Pi cannot output one) and works with the standard Raspberry Pi max98357a overlay on both CM4 and CM5.
Microphones are not on the main board. For people who want voice control, we plan an optional mic-array board on top of the LiDAR cage: four PDM MEMS microphones and an RP2040 that shows up as a standard 4-channel USB microphone. It plugs into the internal USB header.
Debug and flashing
- Compute Module console (Pi board): a 0.1-inch 5-pin UART header that fits common 3.3 V USB-serial cables.
- STM32: a 1.27 mm 2×7 STDC14 header for an ST-LINK V3 MINIE, plus a right-angle 0.1-inch UART header.
- Normal firmware updates need no probe. On the first board, the phone switches the STM32 into its built-in USB bootloader. On the Pi board, the Compute Module reflashes it over the serial bootloader or over SWD from its own GPIOs.
- Flashing the Compute Module eMMC (Pi board) uses the internal USB header and a boot jumper.
- Unpopulated 0.1-inch 2×6 pads bring out spare STM32 pins, I2C, 3.3 V and 5 V for hacking.
How we pick parts
- Hand-solderable packages (SOIC, ESOP) over QFN wherever the cost is similar, so the board stays hackable and repairable.
- Fewer different parts. For example, we cut the MOSFETs from eight part numbers to four: AO3400 and AO3401 for small switches, AO4407C for battery-side switches, and AOD407 only where the charger input needs 60 V.
- Fewer capacitor values too: every 100 nF capacitor is now one 50 V part, and the 10 µF ones went from two part numbers to one.
- Check the datasheet for gate-source voltage. Small SOT-23 MOSFETs are often rated only 12 V, and a gate pulled from 16.8 V to ground would destroy them.
- A flat board: right-angle connectors, a low-profile barrel jack (7.2 mm instead of 11 mm), and nothing taller than the connectors and inductors where we can help it. The bumper photo-interrupters are the exception, since the bumper mechanism sets their size.
- Deep stock at JLCPCB. We plan to build in batches of hundreds, so unit price and stock depth matter more than whether a part is a JLCPCB “Basic” part.
Parametric search on part sites is patchy, so we export whole part categories from JLCPCB, with stock, price and parameters, and filter them ourselves.
What schematic review caught
Building in public means showing the mistakes too. These are the problems we have found and fixed in the schematic so far:
- A rotated logic chip put its ground pin on the same wire as its supply pin, shorting 3.3 V to ground.
- The LiDAR motor MOSFET had its drain wired to ground, so it could not switch anything.
- Several small MOSFETs rated 20 V sat on nodes that see the full 16.8 V battery.
- The carpet driver was a P/N half-bridge whose high side turned off through a 100k resistor: far too slow at 290 kHz, so both transistors would conduct at once each cycle.
- The carpet sensor supply was set to 20 V instead of the intended 14.4 V.
- The USB-C CC pins were unconnected, so a phone would neither charge nor see the robot.
- The USB-C 5 V switch has no reverse-current blocking, so a phone supplying power would have back-fed the robot’s 5 V. Two MOSFETs now block it.
- A 10 µF soft-start capacitor hung directly on an STM32 pin. It now goes through a 1k resistor.
- The charger input capacitors were 25 V parts in 0603, which keep only about 1 µF of their 10 µF at 20 V. They are now 50 V parts in 1206.
Open questions and next steps
- Layout: our PCB engineer has done preliminary placement for the Pi board; the first board is next. PCB shape will be informed by the mechanical design.
- We are asking the carpet sensor vendor for its reference driver circuit, to confirm drive voltage and pull-up value.
- We still need to measure the suction fan controller’s input capacitance, which sets the inrush on the motor rail.
- Firmware: the watchdog toggle, active-low enables, carpet bursts, the power button, USB-C power-role swap, and the STM32 internal watchdog settings.
Want to help or spot a problem? Open an issue on GitHub or join us on Discord.
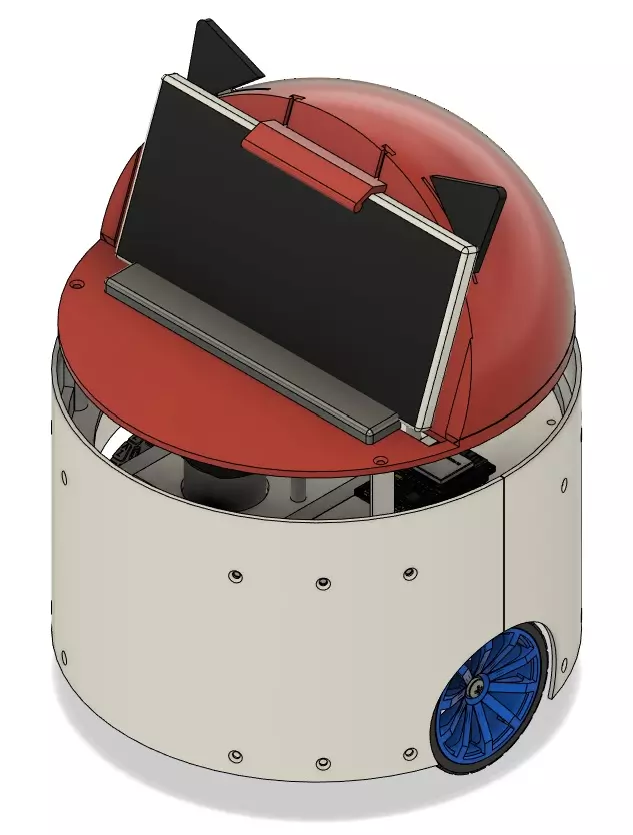
[…] A camera that looks at the floor. One RGB camera instead of a stereo NIR pair, pitched down so OOMWOO can check whether the floor is actually clean, and keep going until it is. Why that matters. […]