How OOMWOO’s 3D design gets made

OOMWOO’s mechanical design is not drawn from a blank sheet. It starts by researching ready-made parts that can’t be 3D printed (motors/sensors), capturing their dimensions, tearing down and reverse-engineering consumer vacuums to learn the state-of-the-art – and remaking that into a novel, 3D printing friendly design. Here is how that pipeline works.
Start from parts you can buy
The starting constraint is availability. Motors, wheels, blower fans, electronics and sensors cannot be 3D printed – and must be purchased. I search these usually on AliExpress and pick for being cheap and abundant, not for being ideal. A part that exists, but nobody can order is of no use. The sourcing choices, with part numbers, are written up in how to source the BOM.
Scan them
Once a part arrives it gets 3D scanned. Some of that happens on my desk with a Creality Raptor – here it is capturing a vacuum suction fan assembly.
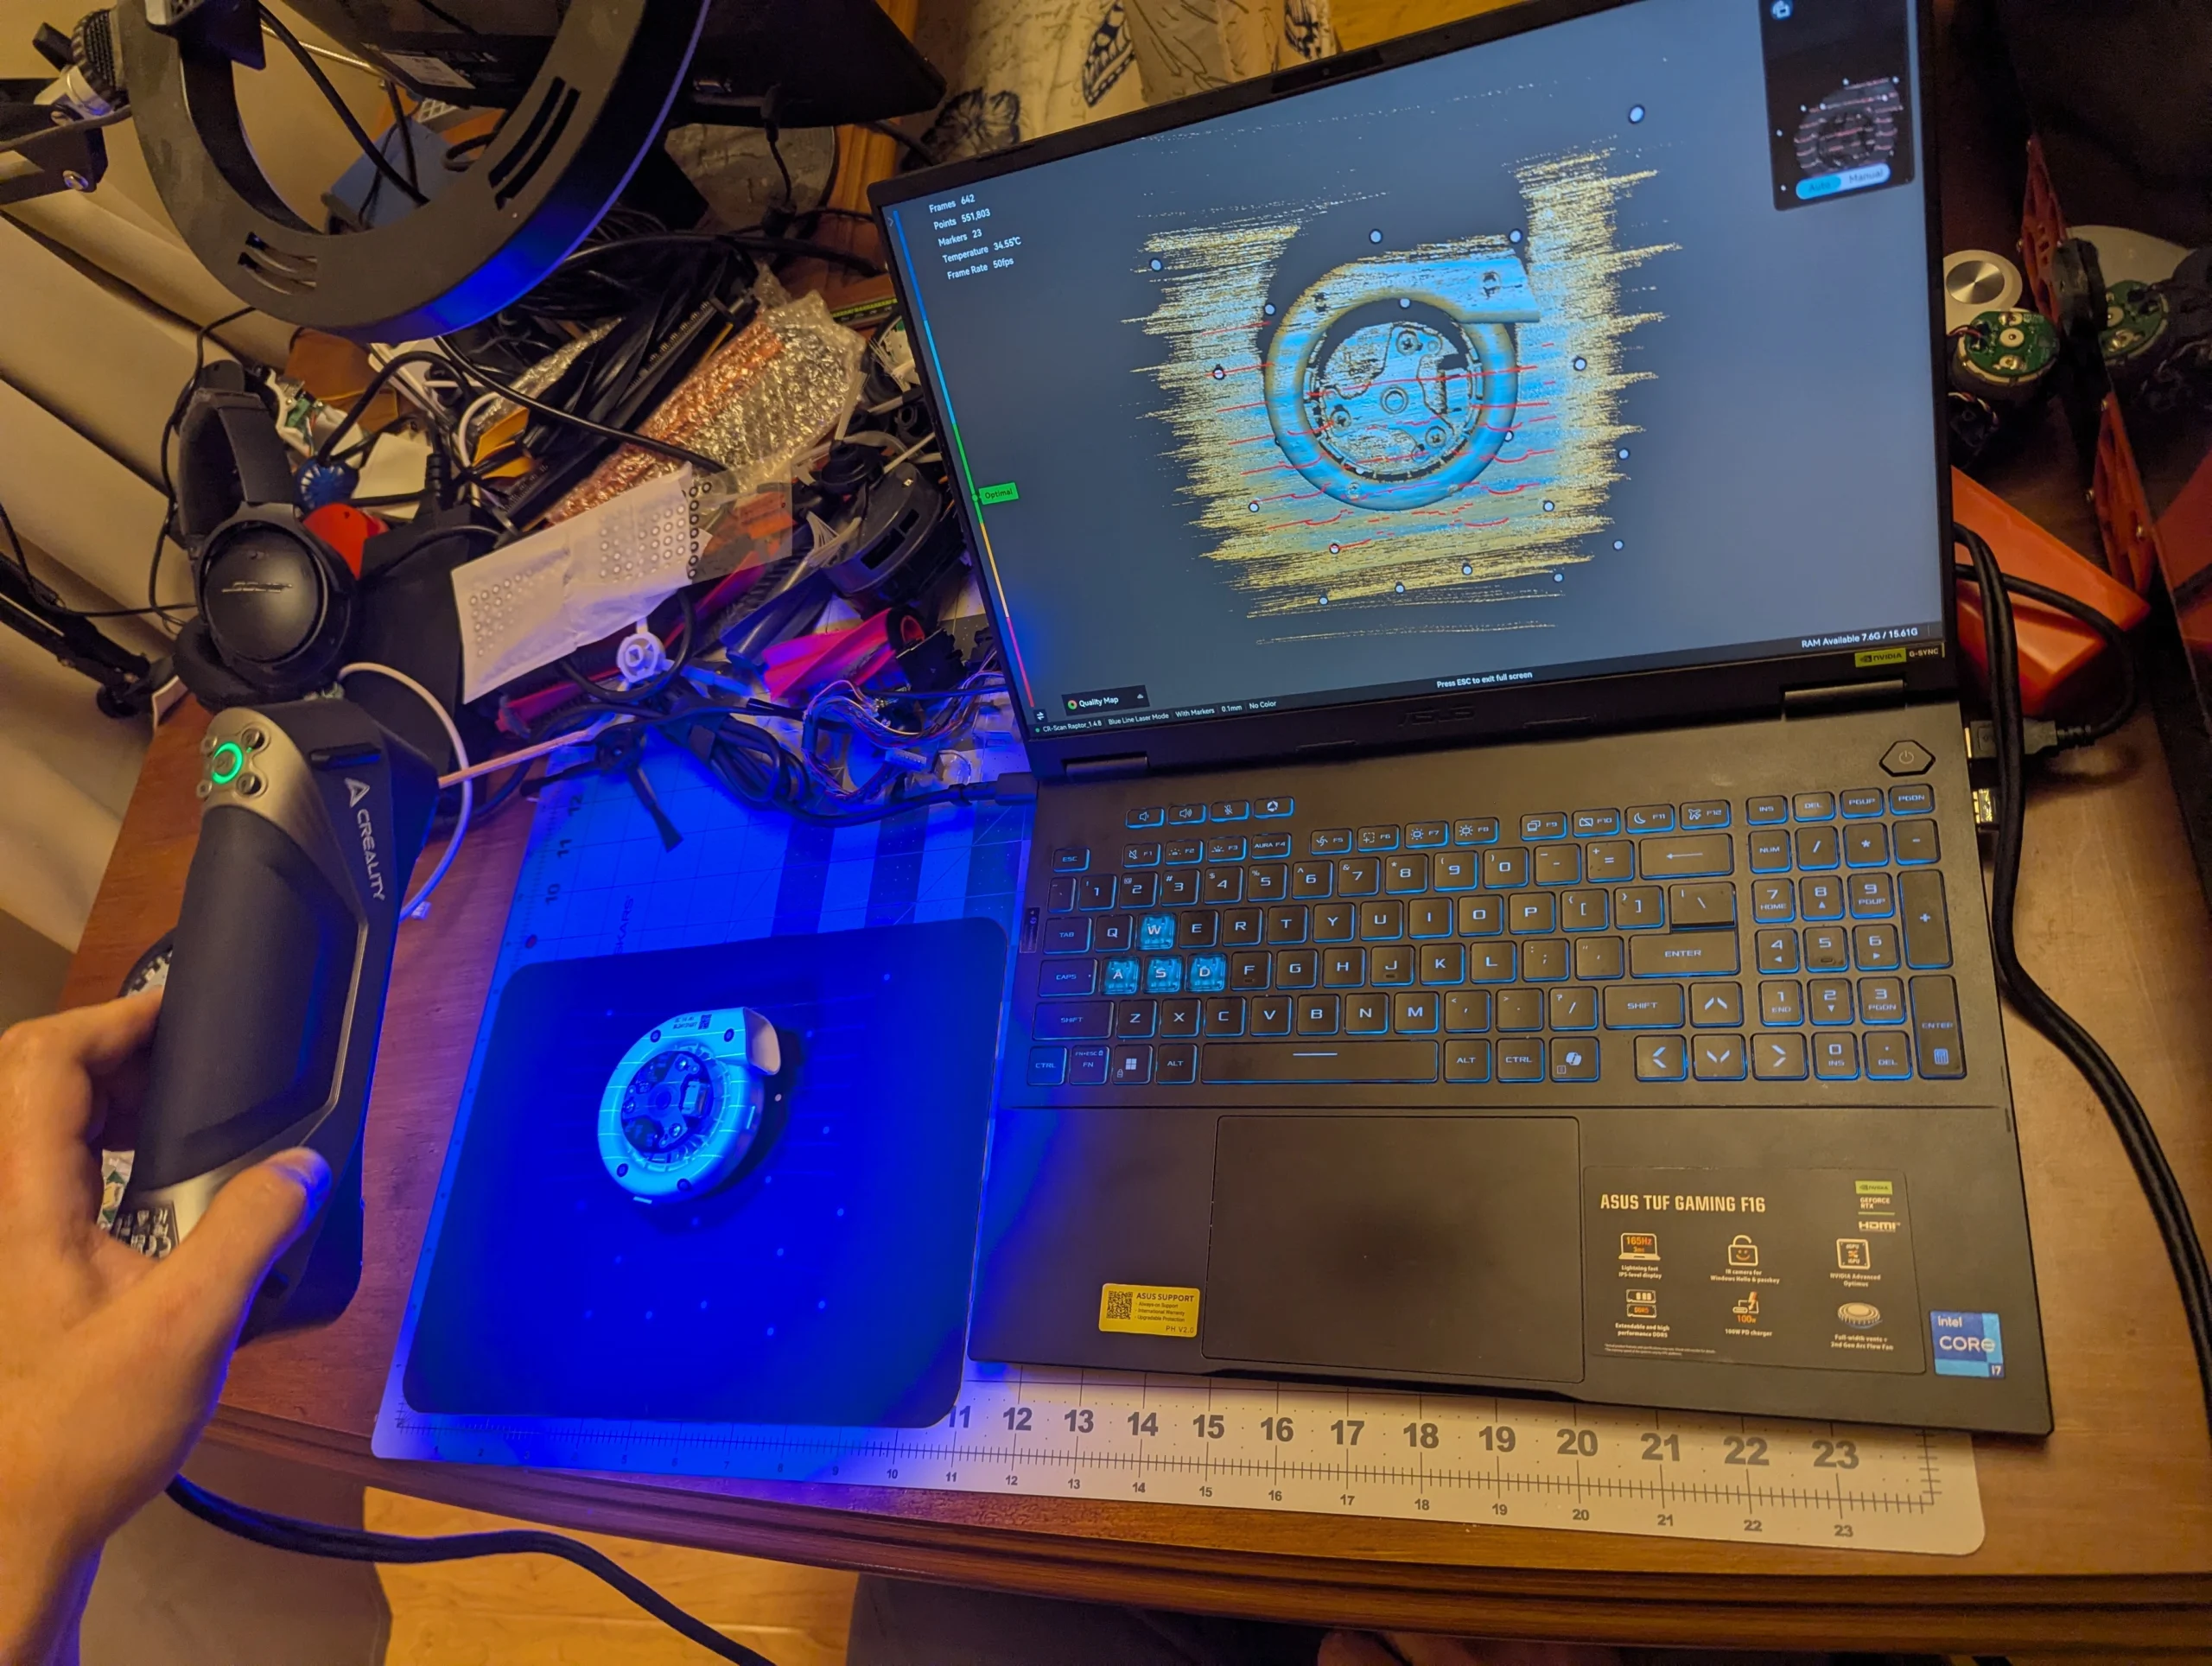
Everything OOMWOO buys off the shelf gets scanned this way – HEPA filters, fans, motor assemblies, brushes, mops. It is nowhere near as quick as taking a photo: about an hour per part.

Setup. The part sits on a 12″ turntable covered with a black silicone non-slip mat. The mat is dotted with marker stickers, which the scanner uses to track its own position in 3D. The more markers, the better.
Scanning. The scanner only works within a certain range of distance and angle. Too close, too far, or too few markers in view are the usual problems. It also struggles with small concave features and with black or transparent materials. The HEPA filter in the video has all three: a clear plastic housing the laser shines straight through, thin black gaskets that absorb it, and deep, narrow pleats. So most parts get scanned several times – on their side, upside down – and each position is a separate scan. For those scans to line up later, I stick markers on the part itself too. Alignment needs at least three shared markers; I use more.
From scans to a mesh. In the scanner software, each scan gets cleaned up first by cutting away the mat, which nearly always ends up in the data. Fusion then merges the many raw points into one cohesive point cloud, and the scans of the same part are aligned into a single merged cloud. That cloud gets meshed, stray bits of mesh are deleted, and the result is saved as an STL file.
From mesh to CAD. A mesh is not CAD yet. It is cleaned up further in Adobe Substance and Blender, converted into a solid body in Fusion 360 and exported as STEP. For some parts it is simpler to design the component from scratch in CAD and use the mesh only as a reference for measurements.
A tiny team doing the heavy lifting
Turning a mesh into clean, editable CAD takes even longer than scanning, so that work goes to freelancers on Upwork, who convert the scans to STEP and Fusion 360 models. One freelancer also bought a Roborock Qrevo 5AE outright, took it apart, scanned it and converted the whole thing – which is a fast way to get a complete, working reference for how a modern vacuum is actually packaged.
Follow OOMWOO build
Open-source robot vacuum community build updates
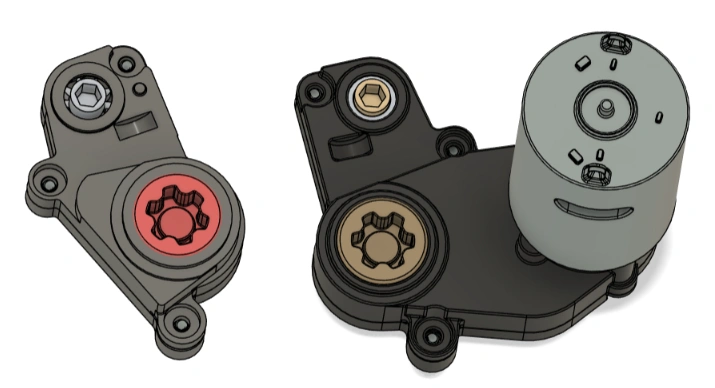
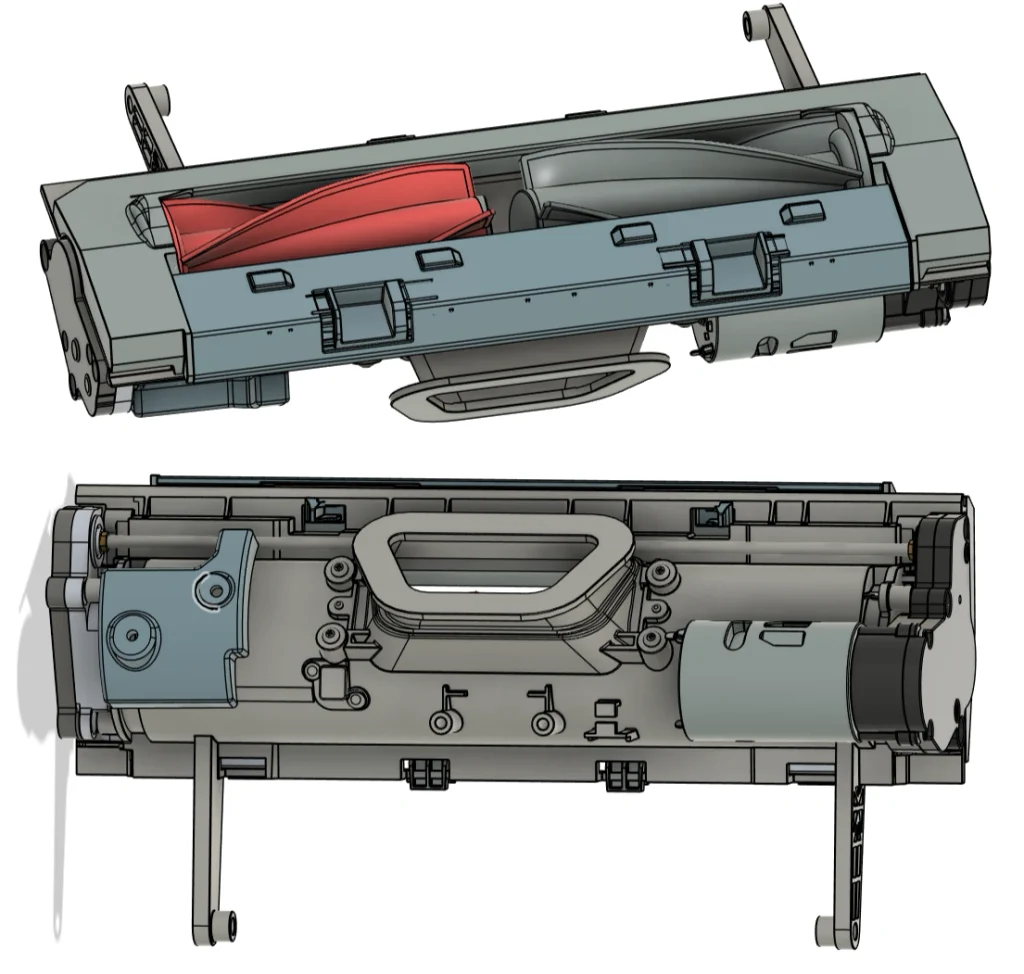
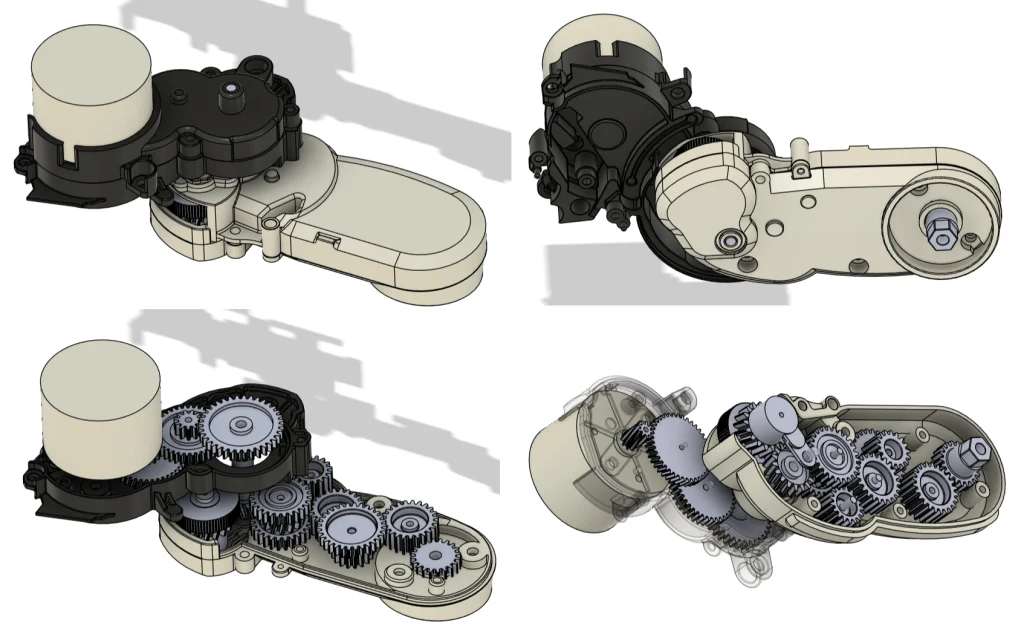
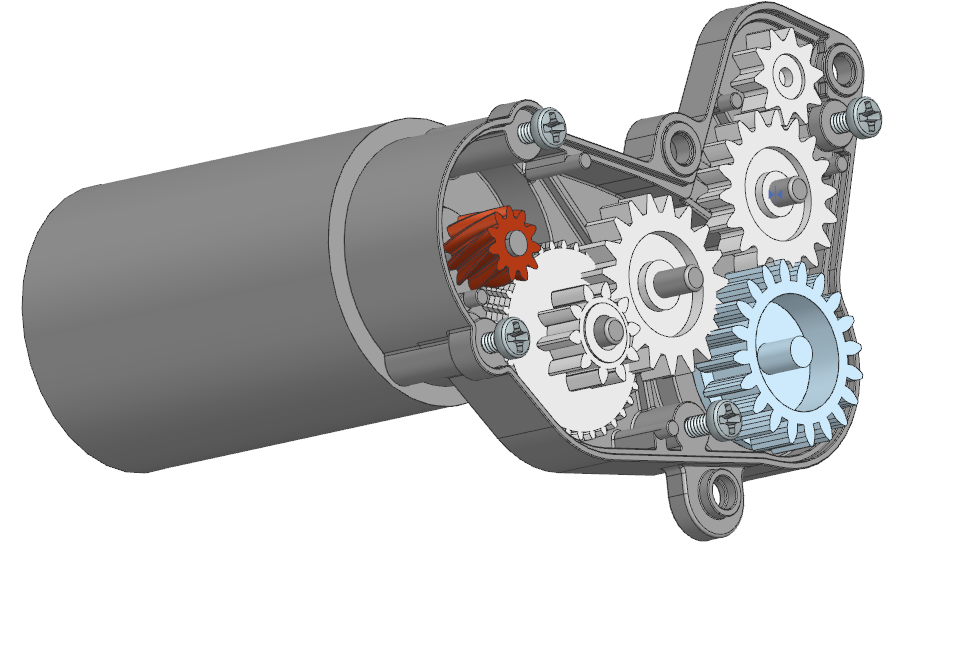
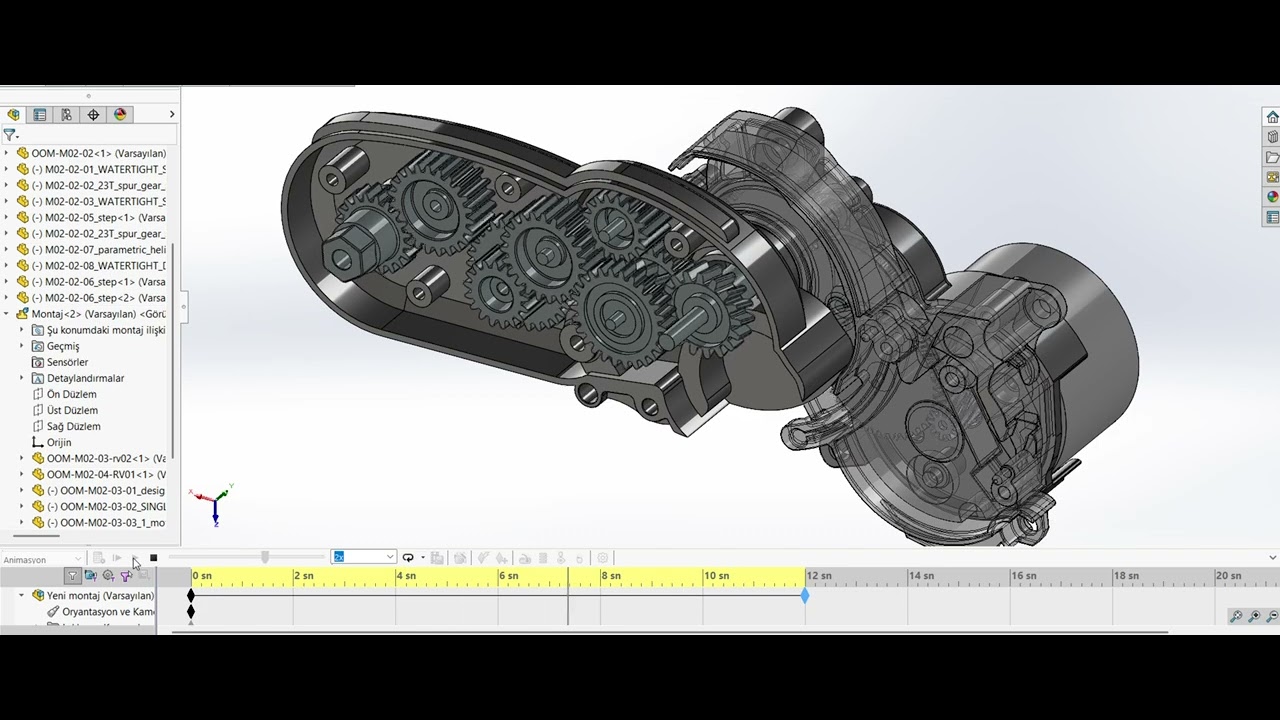
These are working models, not just shells. The Roborock FlexiArm side brush gearbox was taken apart, 3D scanned and rebuilt in CAD with every gear in place, so it can be animated to check that everything meshes. It also shows how many gears a single module in a consumer vacuum packs.

Why the Roborock mops were dropped
OOMWOO One was meant to mop as well as vacuum. Roborock’s mop assemblies are sold as spares, but they are expensive, so the plan was to have them reverse-engineered, adapt the CAD for 3D printing and be done.
The reverse engineering worked. The surprise was inside: the assemblies hold far more gears than I expected. I can print gears on my resin printer, but a build like that asks too much of a typical 3D printing enthusiast – many small, precise parts to print, clean up and assemble, and many ways to get one wrong.
So two things changed. The first came from the community:
- GT2 timing belts and pulleys instead of gear trains. Belts are cheap, standard and forgiving, and pulleys print easily.
- Motors with a metal gearbox, instead of Roborock-style motors that leave the speed reduction to plastic gears in the assembly. The reduction comes built into the motor, so there is little left to gear down.
The cost was most of the Roborock work, which is also why 3D design progress went backwards this month. It was still the right trade: a design that is faithful to the original but hard to build is not much use to someone building their own robot.
Brushes, from parts you can buy
Side brush: an angled brush on a geared motor
The plan was to reuse a cheap off-the-shelf side brush assembly – motor, gearbox and brush mount in one. There were two candidates, both cheap and easy to buy. The catch: both mate the older style of side brush, not the newer angled brushes that resist tangling. Tangle resistance is a must, because “clean well” is OOMWOO’s first goal.
Copying one of those assemblies would mean 3D printing its enclosed gearbox – too advanced for most makers, the same lesson as the mops. So the brush is now driven directly: a JGA25-310 geared DC motor (12 V, about 150 RPM, metal gearbox) stands vertically and turns the brush through a custom shaft coupler. It fits the enclosure, just, and sits far enough out that the bristles cannot get under the wheel. The brush is Dreame’s common 3-arm angled one; Roborock’s common 2-arm curved brush works as an alternative.
Two other motors did not make it. The JGA25-370 is too tall to fit. The N20 has enough torque – a side brush does not need much – but its gearbox looks flimsy, and its life is around 500 hours of gentle use. Robot vacuums aim for about 1,000 hours: roughly three years at an hour a day.
Main brush: a bearing and a threaded rod
Dreame’s main brushes are tapered, so each is held at one end only, by a bearing and a long steel rod running through the brush core. A notch on the rod clicks into a clip inside the core, and the hex-shaped base of the rod drives the brush. To replace a brush, you slide it off the rod. Dreame uses an S625 RS bearing: 16 mm across, 5 mm wide, 5 mm bore.
OOMWOO replaces the steel rod with an M3 threaded rod and a custom M3 coupler. The coupler fits tightly into the bearing and is hex-shaped to drive the brush, and a custom screw-on tip at the end latches into the clip inside the brush. The coupler’s other end takes the brush gear.
The bearing is tentatively a 608 2RS: cheap, easy to buy, and a little bigger than Dreame’s, as insurance for 3D-printed parts holding looser tolerances than injection-molded ones. A poorly seated bearing would tilt the long brush.
Main brush drive: printed gears, no belt
The two tapered brushes sit 33.5 mm apart, centre to centre – the spacing Dreame uses in my L60 Ultra PE – and they turn towards each other, so one has to run the opposite way to the other. A pair of identical spur gears does exactly that.
The first plan was a GT2 timing belt from the motor (a DC gear motor about 25 mm across, with a 4 mm shaft) to one brush, then the gear pair. Once modelled, the belt pulley added about 16 mm to the width of the assembly – on top of everything else that makes a printed design wider than a molded one: thicker cavity walls, thicker gears, and a wider bearing seat, because a brush held from one end only needs a snug bearing to stay straight. So the belt is gone. A third printed gear, a pinion on the motor shaft, drives the pair directly. That drops three purchased parts – two pulleys and the belt – and the pinion gets its grub screw built in.
Which gears. Off-the-shelf POM (Delrin) gears would be ideal: tough, slippery, cheap. The catch is size. Module 0.5 gears are cheap and plentiful, but 33.5 mm needs 67 teeth, and they are only about 2 mm thick with a 2-3 mm bore. A 34-tooth module 1 POM gear exists but is rare (around $4 plus $6.50 shipping on AliExpress, $16 on Amazon), and the other modules that would fit are not sold retail at all. A LEGO gear comes close, but at 36 mm it is the wrong size, it has no centre hole, and it is ABS.
So the gears are 3D printed for the prototype. Printed gears will wear out well before the 1,000 hours a robot vacuum is expected to last (about an hour a day for three years), so the next step is cutting them from 1/4″ Delrin sheet on a desktop router. A $15 6″ by 12″ sheet makes about 20 gears, and cutting gives the hex hole for free. Makers can print their own – Delrin filament exists, though it warps and is hard to stick to the bed, which small gears make bearable – or get cut gears in the kit.
First-prototype gear settings, from the Fusion 360 spur gear script: metric, 20° pressure angle, 17 teeth, module 1.97 (33.5 mm / 17), 0.15 mm backlash for FDM printing, a 0.8 mm root fillet for strength and printability, and 1/4″ thick to match the Delrin sheet.
First prototype. The cavity is printed and assembled. It is very basic: the two tapered brushes, each on its bearing and spur gear, and the motor pinion driving one of the brush gears.

Width was one reason to drop the belt; direction is the other. A timing belt turns both pulleys the same way, so it cannot reverse the second brush on its own – only a two-sided belt can, and two-sided GT2 belts are rare and expensive. Gears do it for free.
Consumer vacuums mould their gears from Delrin (POM), which is durable and self-lubricating. Delrin is tricky to print – it sticks poorly to the bed and shrinks – but it works: I now print the gears in POM on a base of two PETG layers. Here is how I 3D print gears using POM (Delrin). The router stays as a backup.
Main brush gearbox: why two gears were not enough
Printing and assembling that first prototype showed my mistakes, and both the brush mounts and the gearbox went through about four redesigns each. The lessons:
Two gears make the gearbox too big. The brushes sit one brush diameter apart, plus a gap of a few millimetres – both brushes are about the same size. Two gears meeting in the middle must have the same number of teeth, so both brushes turn at the same speed. Their size is then set by the brush spacing: each comes out slightly bigger than the brush. Add the gearbox wall around them, and the brushes can no longer reach the floor.
So: more, smaller gears. Two small brush gears with two idlers between them still turn the brushes towards each other, and keep the gearbox inside the brush outline. Dreame’s own main brush gearbox does exactly this with four gears: two 19-tooth idlers (about 14.6 mm pitch diameter) and two 20-tooth gears, one per brush (about 15.5 mm). I estimate their module at about 0.75.
Small gears, but not too small for a printer. Module 1 printed in POM did not look usable at all: the teeth came out feeble and poorly shaped. PETG might look a little better, but overall gears with a module this small do not seem printable. Module 1.6 came out well-shaped and strong in POM. The reason is the nozzle: at module 1.6 the tooth tip is about 0.9 mm wide, room for a 0.4 mm nozzle to lay down proper lines. A 0.8 mm tip corresponds to about module 1.42 – that is the smallest module I would recommend for printing.
The tooth count is the open problem. The gearbox now has five gears – two brush gears, two idlers that reverse the rotation, and a pinion on the DC motor shaft – all 12 teeth, module 1.6. That is the most teeth I could fit in the space. The usual guidance is at least 17 teeth at a 20° pressure angle, to avoid undercut and keep transmission efficiency up, or 9-13 teeth at 25°.
I assumed undercut only matters for machined gears, where the cutter removes the material. That is partly true: the cutter makes the undercut. The cause, though, is geometric – with few teeth, the tip of the mating tooth sweeps into the root of the other – so printed gears have it too, and it shows up as gear generator scripts not drawing low-tooth-count gears properly. The right generator, one that supports profile shift, should solve it. Dropping from module 1.6 to about 1.45 might also make room for 13 teeth.
After four rounds, the design is good enough to print and test, so I am leaving it as it is and will circle back to the gears later. The two idler gears turn on 3 mm x 12 mm stainless steel dowel pins – 100 of them cost $6.29 on Amazon.

How it avoids hair tangling. The goal is practically zero tangling of long hair. The two off-the-shelf Dreame brushes are tapered and turn towards each other. Long hair loops over the brushes, gradually slides toward the narrow end, drops off and gets sucked into the dust bin. Both brushes are removable now, for cleaning or replacement.
A floating brush box. The brush box is not fixed rigidly to the robot. It drops to the floor under its own weight, and the robot effectively drags it around, so the brushes stay on the floor.
What comes next
None of these assemblies can be used as-is. They are accurate copies of somebody else’s parts, so the next pass is to test them, tweak or completely remake them and ultimately make them 3D printable: splitting pieces to fit a printer’s build volume, reshaping to cut supports, and adding the tolerances a printed part needs but a molded one does not.
That work has started. Every part is being designed to print: the base, the enclosure top and the bumper top each have a flat side to lie on the print bed, and the bumper skirt is a separate flat part that screws onto the bumper. Bought parts fill in the rest – Roborock wheels and battery, a Dreame HEPA filter and suction fan, and iRobot cliff and bumper sensors.

Three days later, the design had moved on:
- A place for a phone. An old Android smartphone with USB-C now has a spot in the robot, where it can stand in for the Raspberry Pi CM4/CM5 as the screen and compute.
- Brushes. The fixed side brush and Dreame’s tapered dual main brushes are in – more on both above. Practically no tangling.
- A camera that looks at the floor. One RGB camera instead of a stereo NIR pair, pitched down so OOMWOO can check whether the floor is actually clean, and keep going until it is. Why that matters.

The plan for materials is split. The few gears that remain go to SLA, which holds tooth detail well enough to mesh. Enclosures and brackets go to FDM, which is cheaper and tougher for large parts. The first printed assemblies are landing now, and the results will show up in the build instructions.
Related: hardware bring-up covers what happens once these parts are on the bench – pinouts, connectors and measured currents.
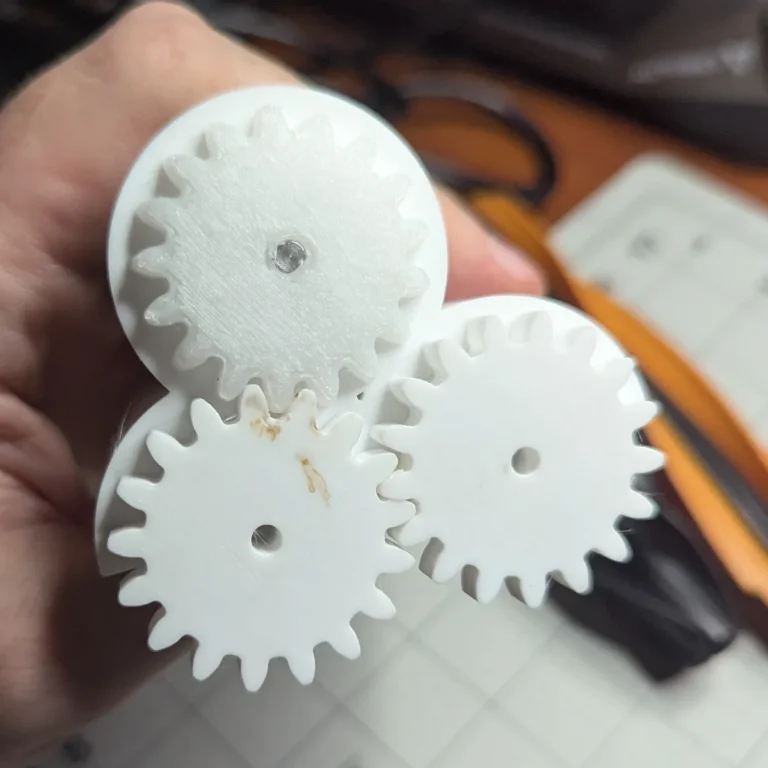
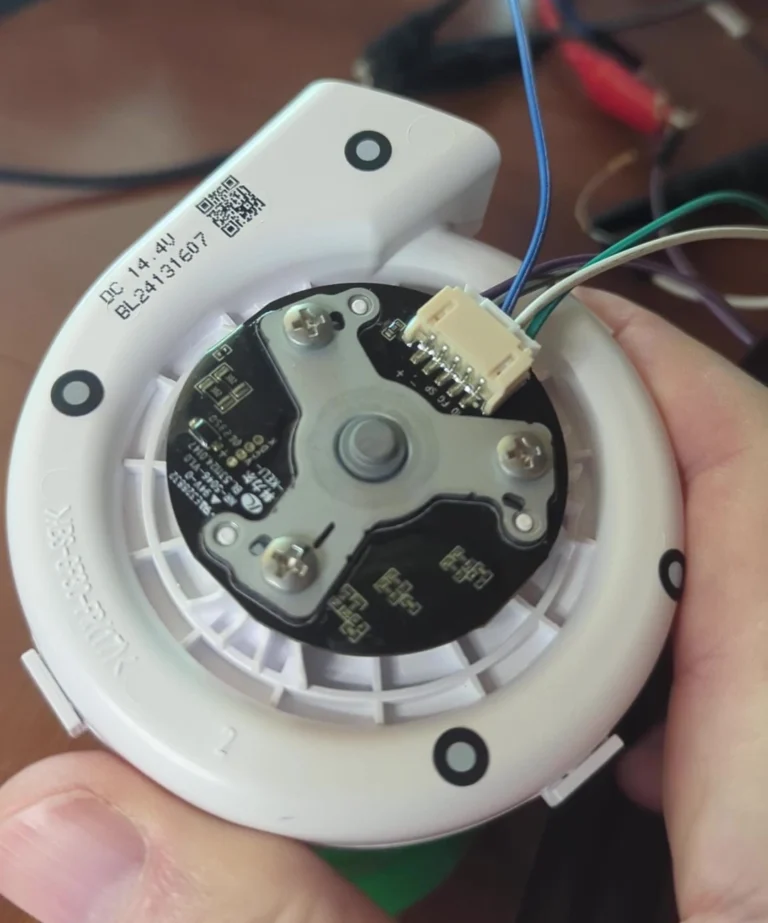
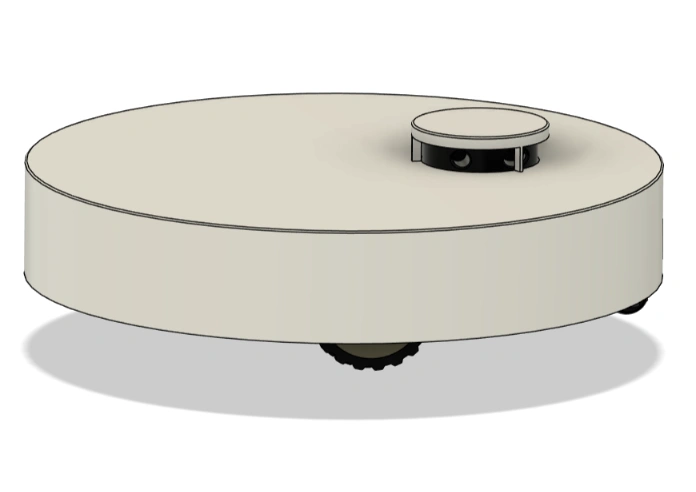
[…] How these get made – sourcing, 3D scanning and the CAD pipeline – is covered in how the 3D design gets made. […]