Free worldwide shiping on $150+
How to scrape 3D-printed plastic off the build surface properly
If you are reading this post, chances are you have some trouble scraping plastic – of even removing entire 3D-printed parts – off the build surface.
There is a bit of a know-how to this chore – here is how I do this.
Getting your part off the build surface
I always remove the printed part before scraping the leftover printed filament off the build surface.
Sometimes 3D-printed parts come off the build surface after the print completes easily – and sometimes not.
My key advice here – pay attention to the build surface temperature. Specifically, does your 3D-printed part come off the build surface easier when the build surface is cold, i.e., room temperature – or when the build surface is (still) warm or hot.
Filament prone to warping as temperature changes – including unmodified ABS, ASA, Nylon, Polycarbonate – can sometimes pop off the build surface once the build surface cools down – without you event doing anything. If that’s your case – good for you!
However, if your build surface adhesion is too high for these filament types, a 3D-printed part stuck to your build surface “for good” can actually warp – and even damage – your build surface as the build surface cools down. In this case, consider dialing down your build surface adhesion – more on that in a separate blog post. But for now, try removing the part while the build surface is still hot. Re-warm up your build surface if necessary and use the scraper tool below.
Get new tutorials by email
3D printers with a removable build surface
3D printers with a removable steel sheet build surface – e.g., Prusa MK3S. Removable build surfaces, generally, are pleasure to use – as opposed, say, to stock Voron 2.4 non-removable build surfaces.All you usually have to do is take the build surface off the 3D printer, bend the surface slightly – which is usually a steel sheet that bends and springs right back nicely – and the part pops off effortlessly, usually.
Usually is the key word – sometimes the part sticks to the build surface so hard as if glued. In this case, try scraping the part off the build surface using the scraper below – with the build surface hot, warm or cold. Again, be careful when choosing the build surface temperature! A part printed with a filament that’s prone to warping can warp your build surface and damage it as your build surface cools down – for example by ripping the PEI layer off your build surface, if your build surface has PEI.
N.B. I’ve seen removable build surfaces for Voron 2.4 – you may want to consider using those if you own a Voron 2.4.
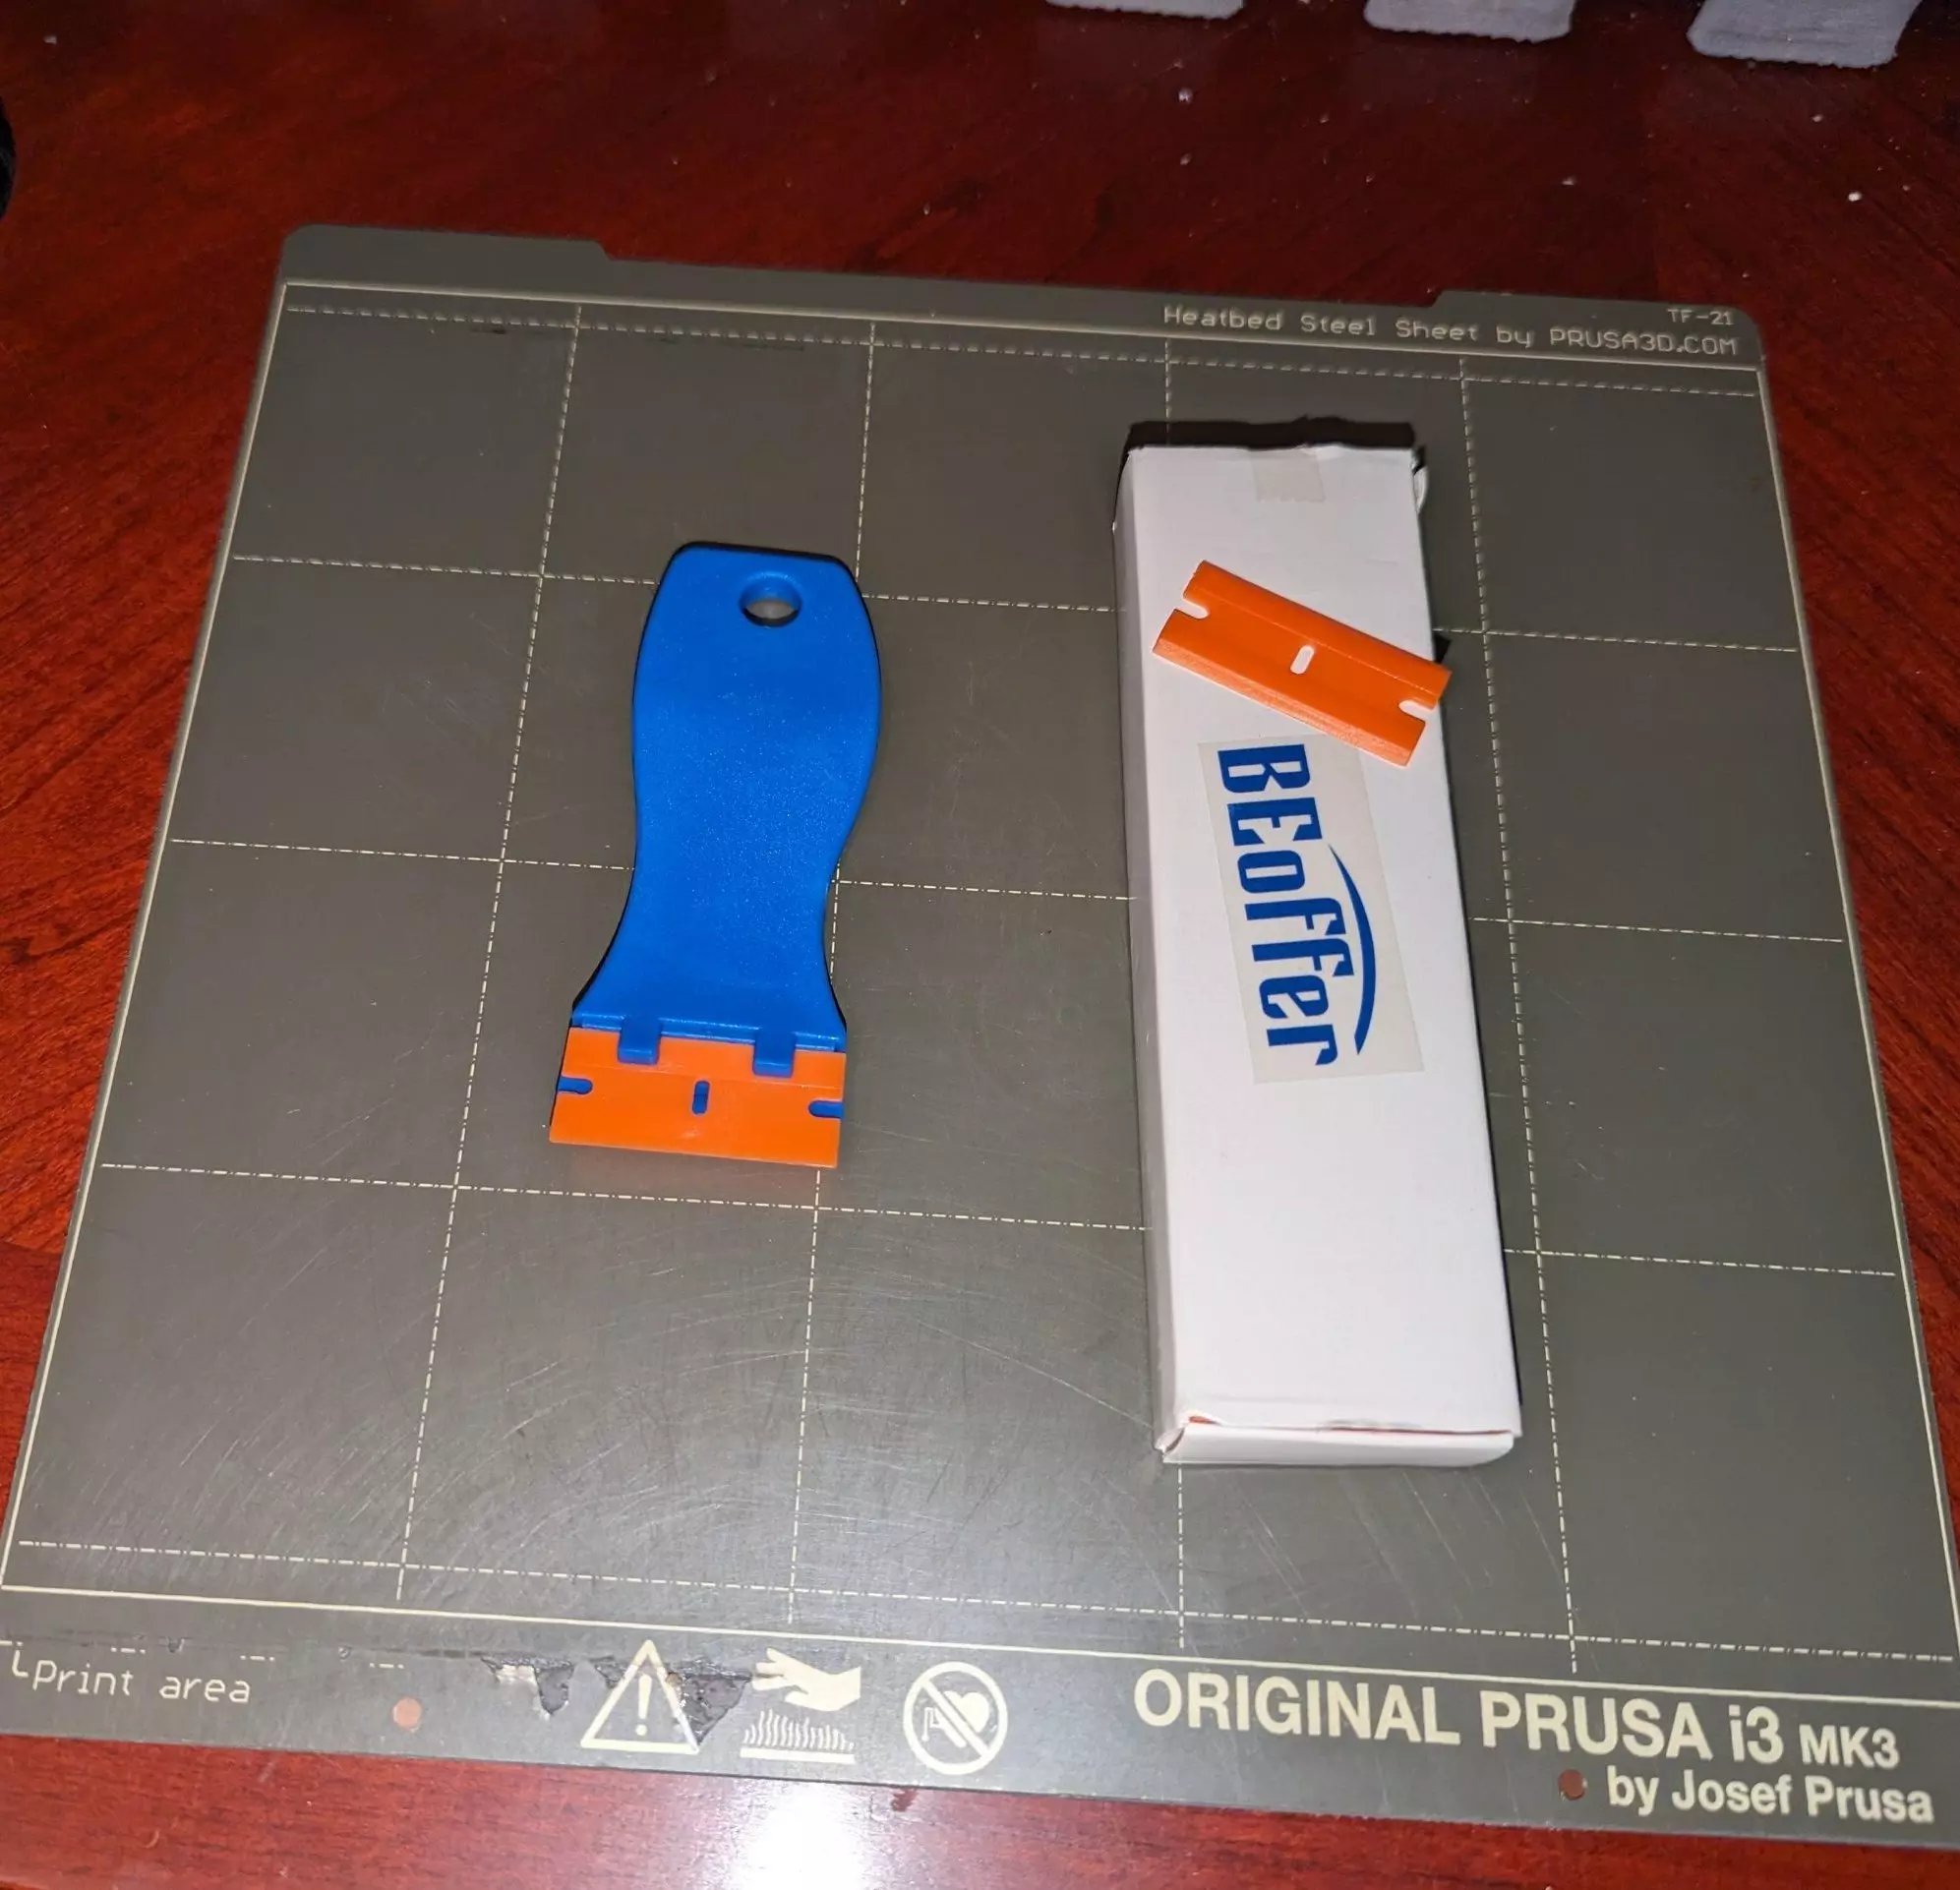
Best scraper ever – for me
I use the scraper below. It has a plastic replaceable blade that does not damage your build surface – especially ones with a PEI sheet.
You can find it on Amazon by searching for “Plastic Razor Blade Scrapers with 100 Pack Plastic Replacement Blades” or something like that. I’m not affiliated with any Amazon sellers.
I did manage to damage the PEI surface when scraping off 3D printed plastic – before I know better – but only because the filament got stuck to the PEI surface really badly. In a case like that, try re-warming the build surface until the filament gets soft – and try scraping it off again.

Prolong your building surface’s life
If you’d like to your building surface last longer, consider varying where you place your 3D parts to be printed in your slicer software. Don’t just always place your 3D parts in the center of the build surface – that can wear out the center your build surface too soon.
Also, printers like Prusa MK3S, MK2.5S always purge the extruder nozzle – when a print starts – at the same location on the build surface. Scraping those purge lines again and again – at the same location – can also damage your build surface. See if your printer can be reconfigured to vary the location of the purge line. For example, you can reconfigure Voron 2.4 running Klipper software to relocate the purge line as a function of the print size.
Last, but not the least, do this before each print to make your purge line plastic come off easily – simply smudge/wipe your finger on your build surface where the purge line will be printed. Gross, but it works – the oilier your finger is, the better.
Jokes aside, just spread a tiny bit of oil over the purge line with a rag before you start your print.
Great, you’ve made it to the end of the article! I hope it helps.
In the next post we will talk about the regulating the building surface adhesion for various 3D printers.
Happy 3D printing!