How to Connect YDLIDAR X3, X3PRO, X2, X2L, X4 and SCL to Maker's Pet ESP32 Boards
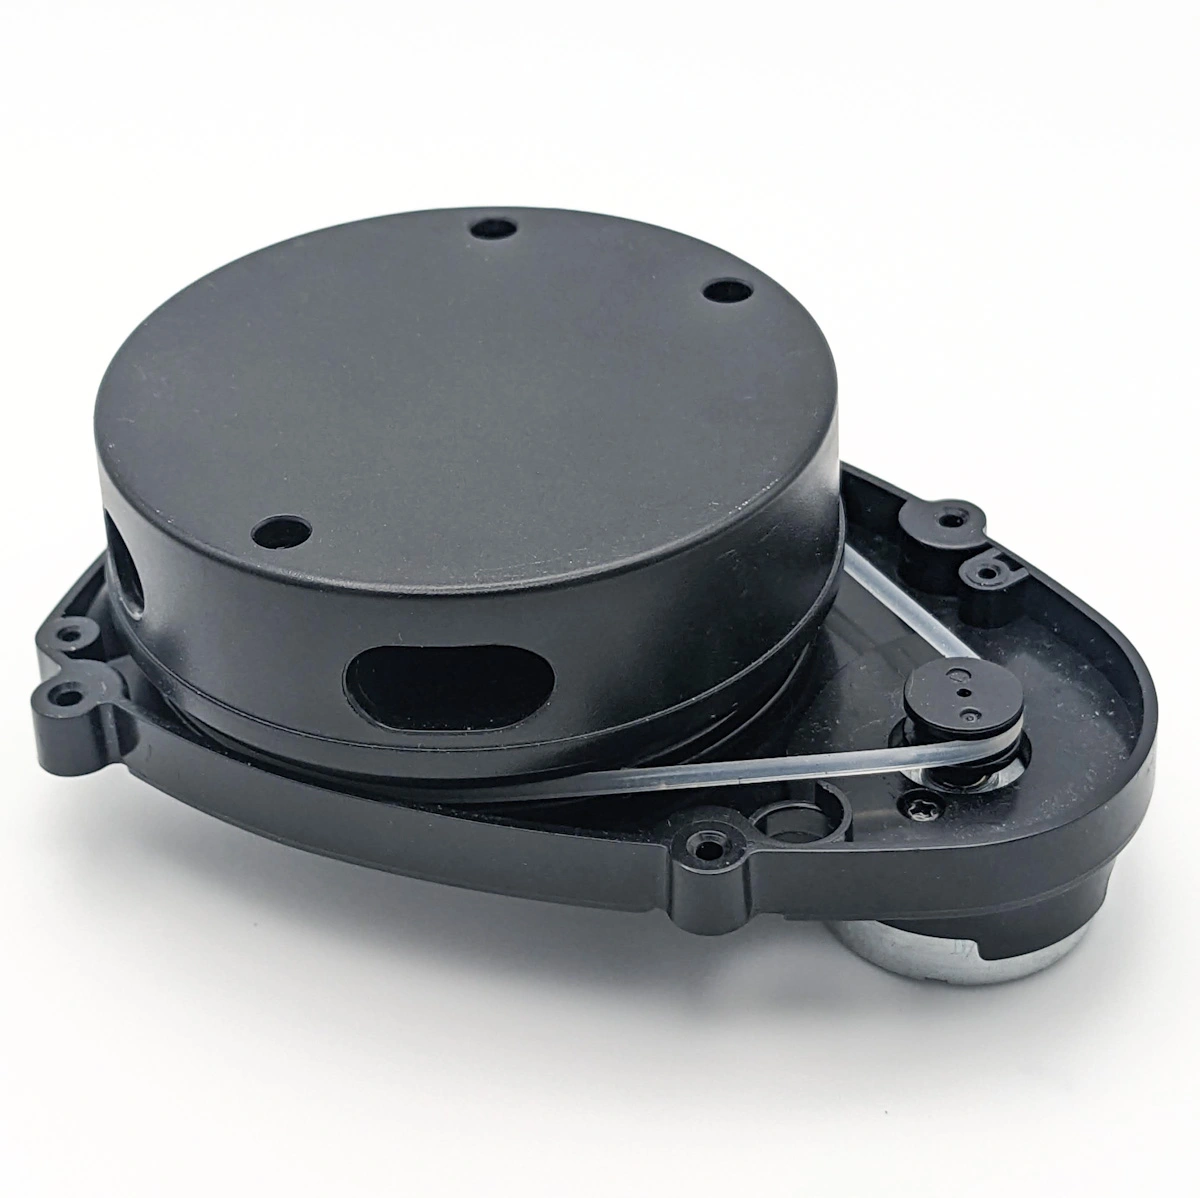
YDLIDAR X3, X3PRO, X2 and X2L are a low-cost 2D LiDAR 360-degree distance sensor used in robotics for navigation. Here are instructions to connect YDLIDAR X3/X3PRO and X2/X2L to the LiDAR port on Maker’s Pet BDC-30P and BDC-38P motor driver and ESP32 carrier boards.
Hardware Wiring
Maker’s Pet BDC-30P and BDC-38C4 motor driver and ESP32 carrier boards have an 8-pin LiDAR header connector. The LiDAR header can be connected to a large variety of 2D LiDARs. The LiDAR header pins include:
- LiDAR TX
- LiDAR RX
- +5V power for LiDAR
- GND ground for LiDAR
- M- LiDAR’s motor negative terminal
- M+ LiDAR’s motor positive terminal (connected to +5V power)
- PWM for LiDAR motor speed control
- EN for LiDAR enable/disable (used by YDLIDAR X4 only)
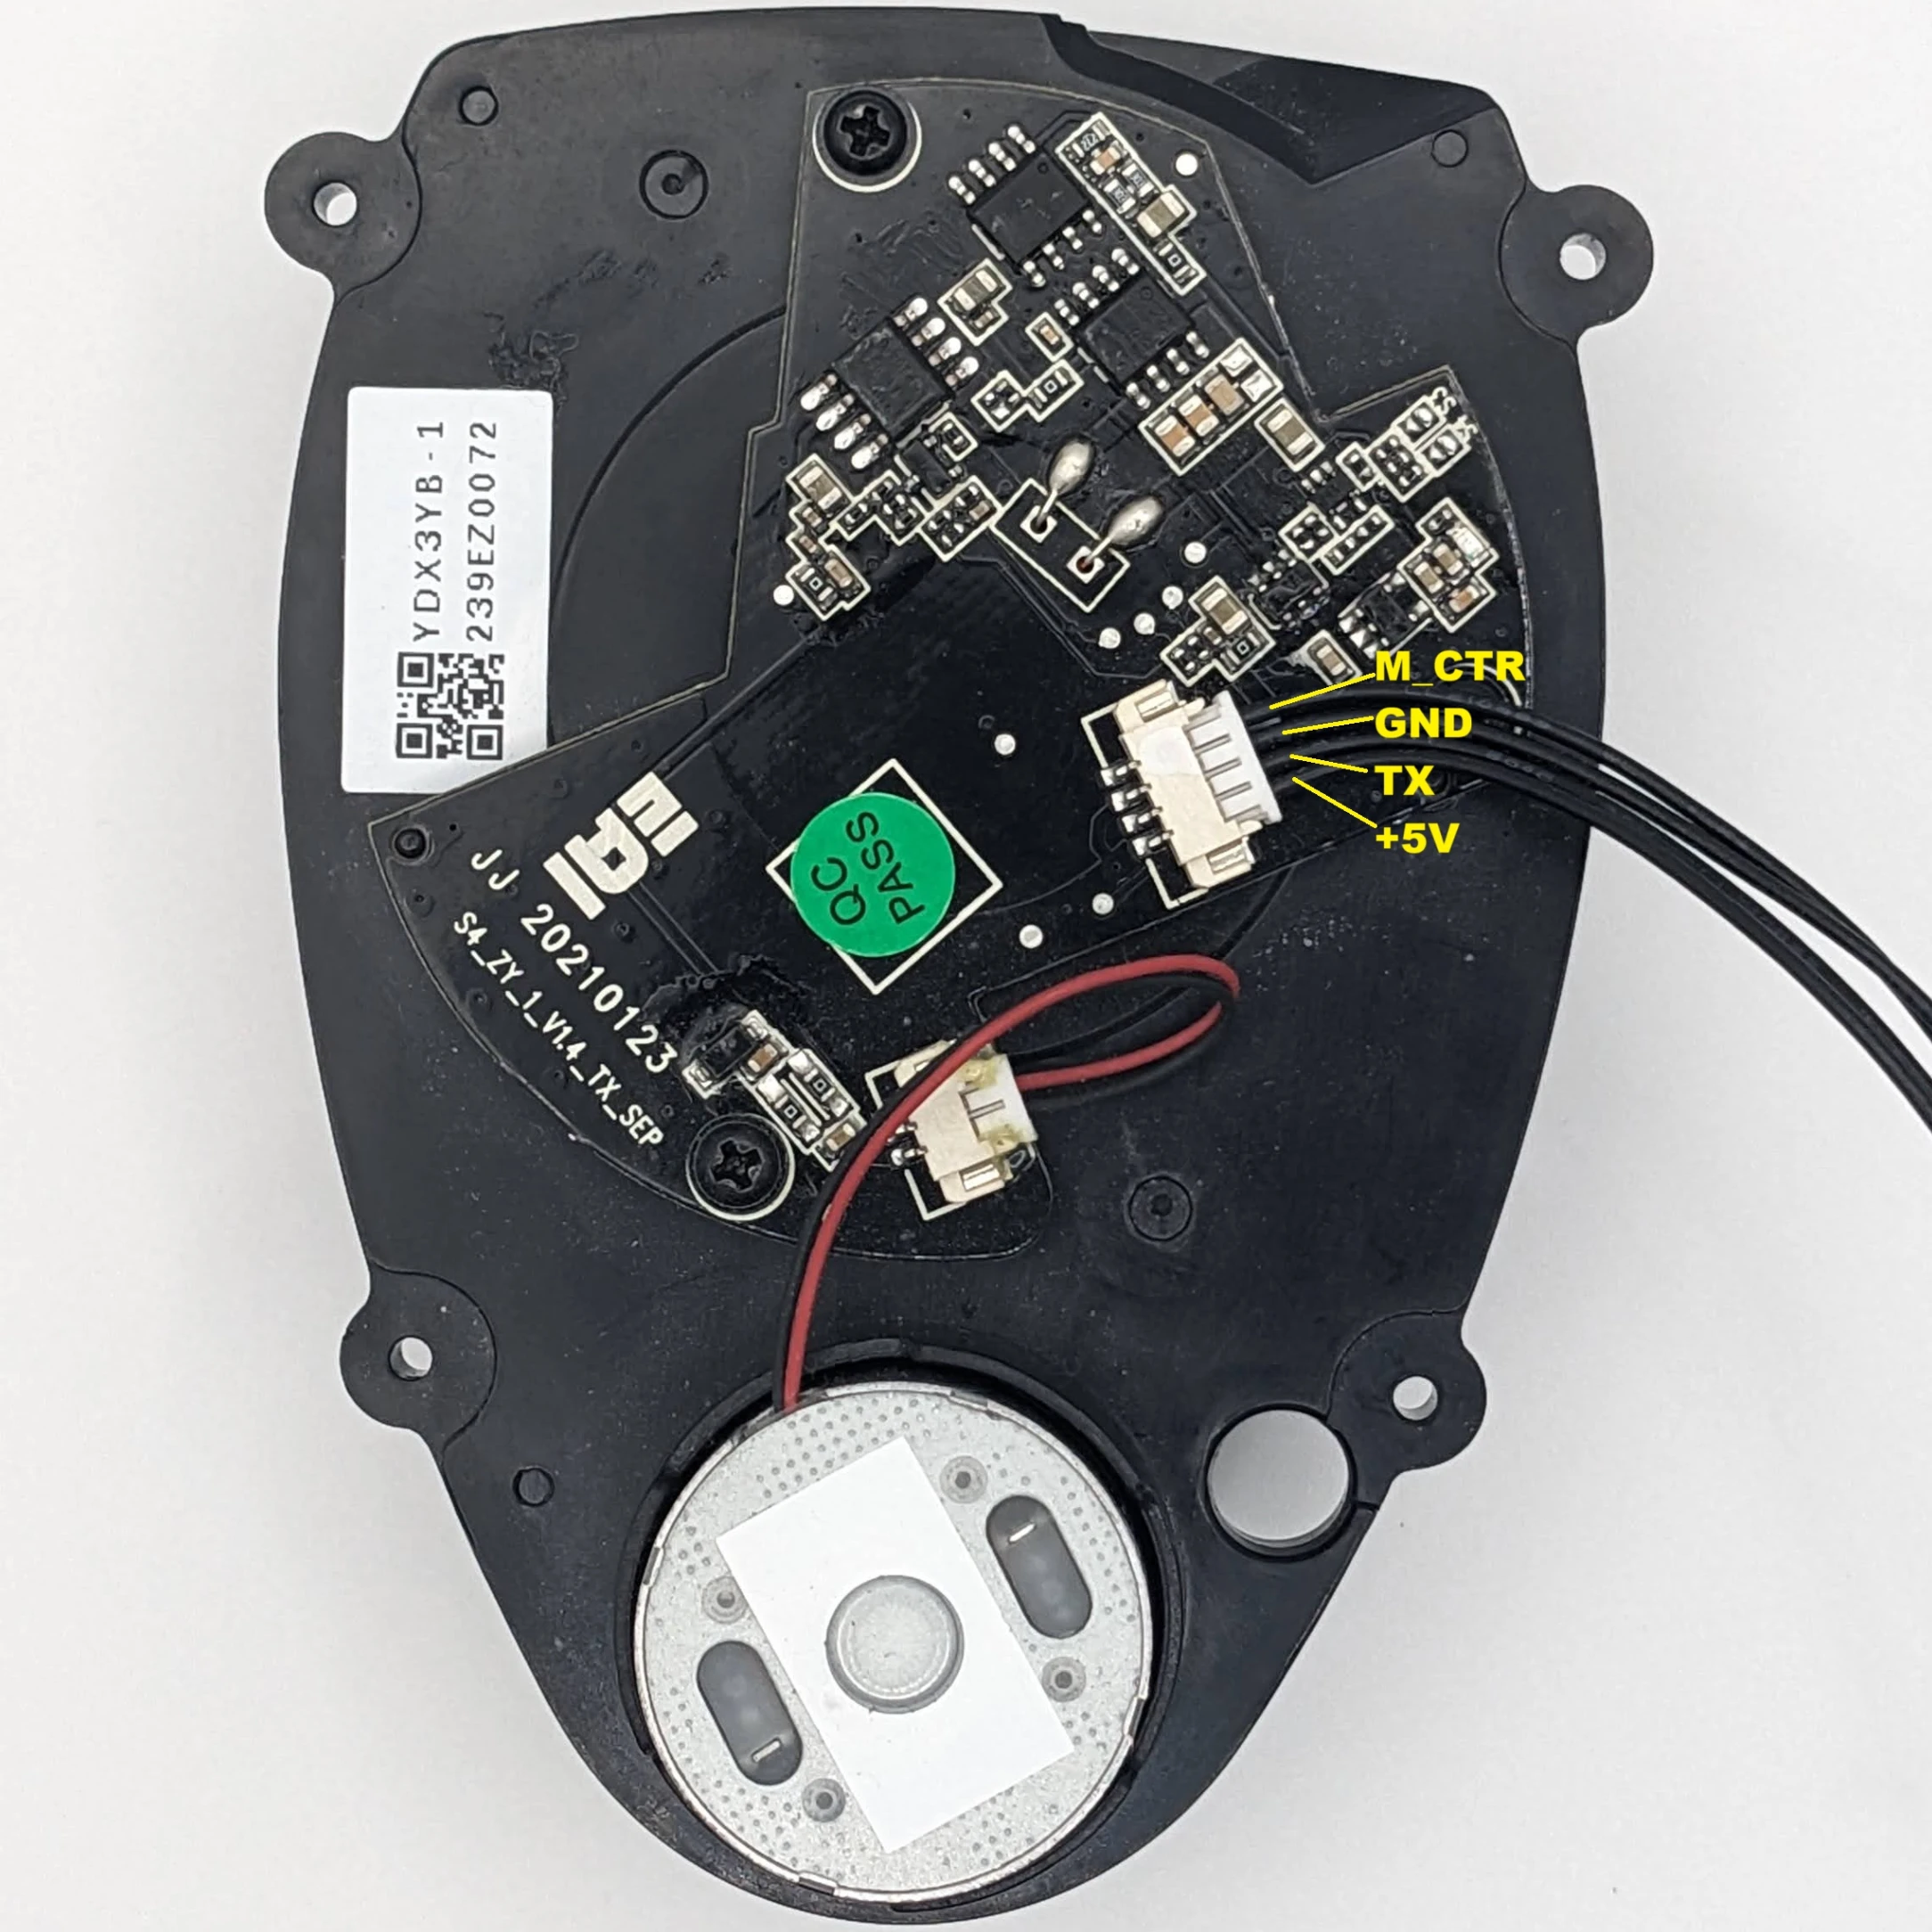
YDLIDAR X3/X3PRO and X2/X2L have a Molex PicoBlade 1.25mm 4-pin connector. The photo below shows the YDLIDAR X3/X3PRO connector pinout.
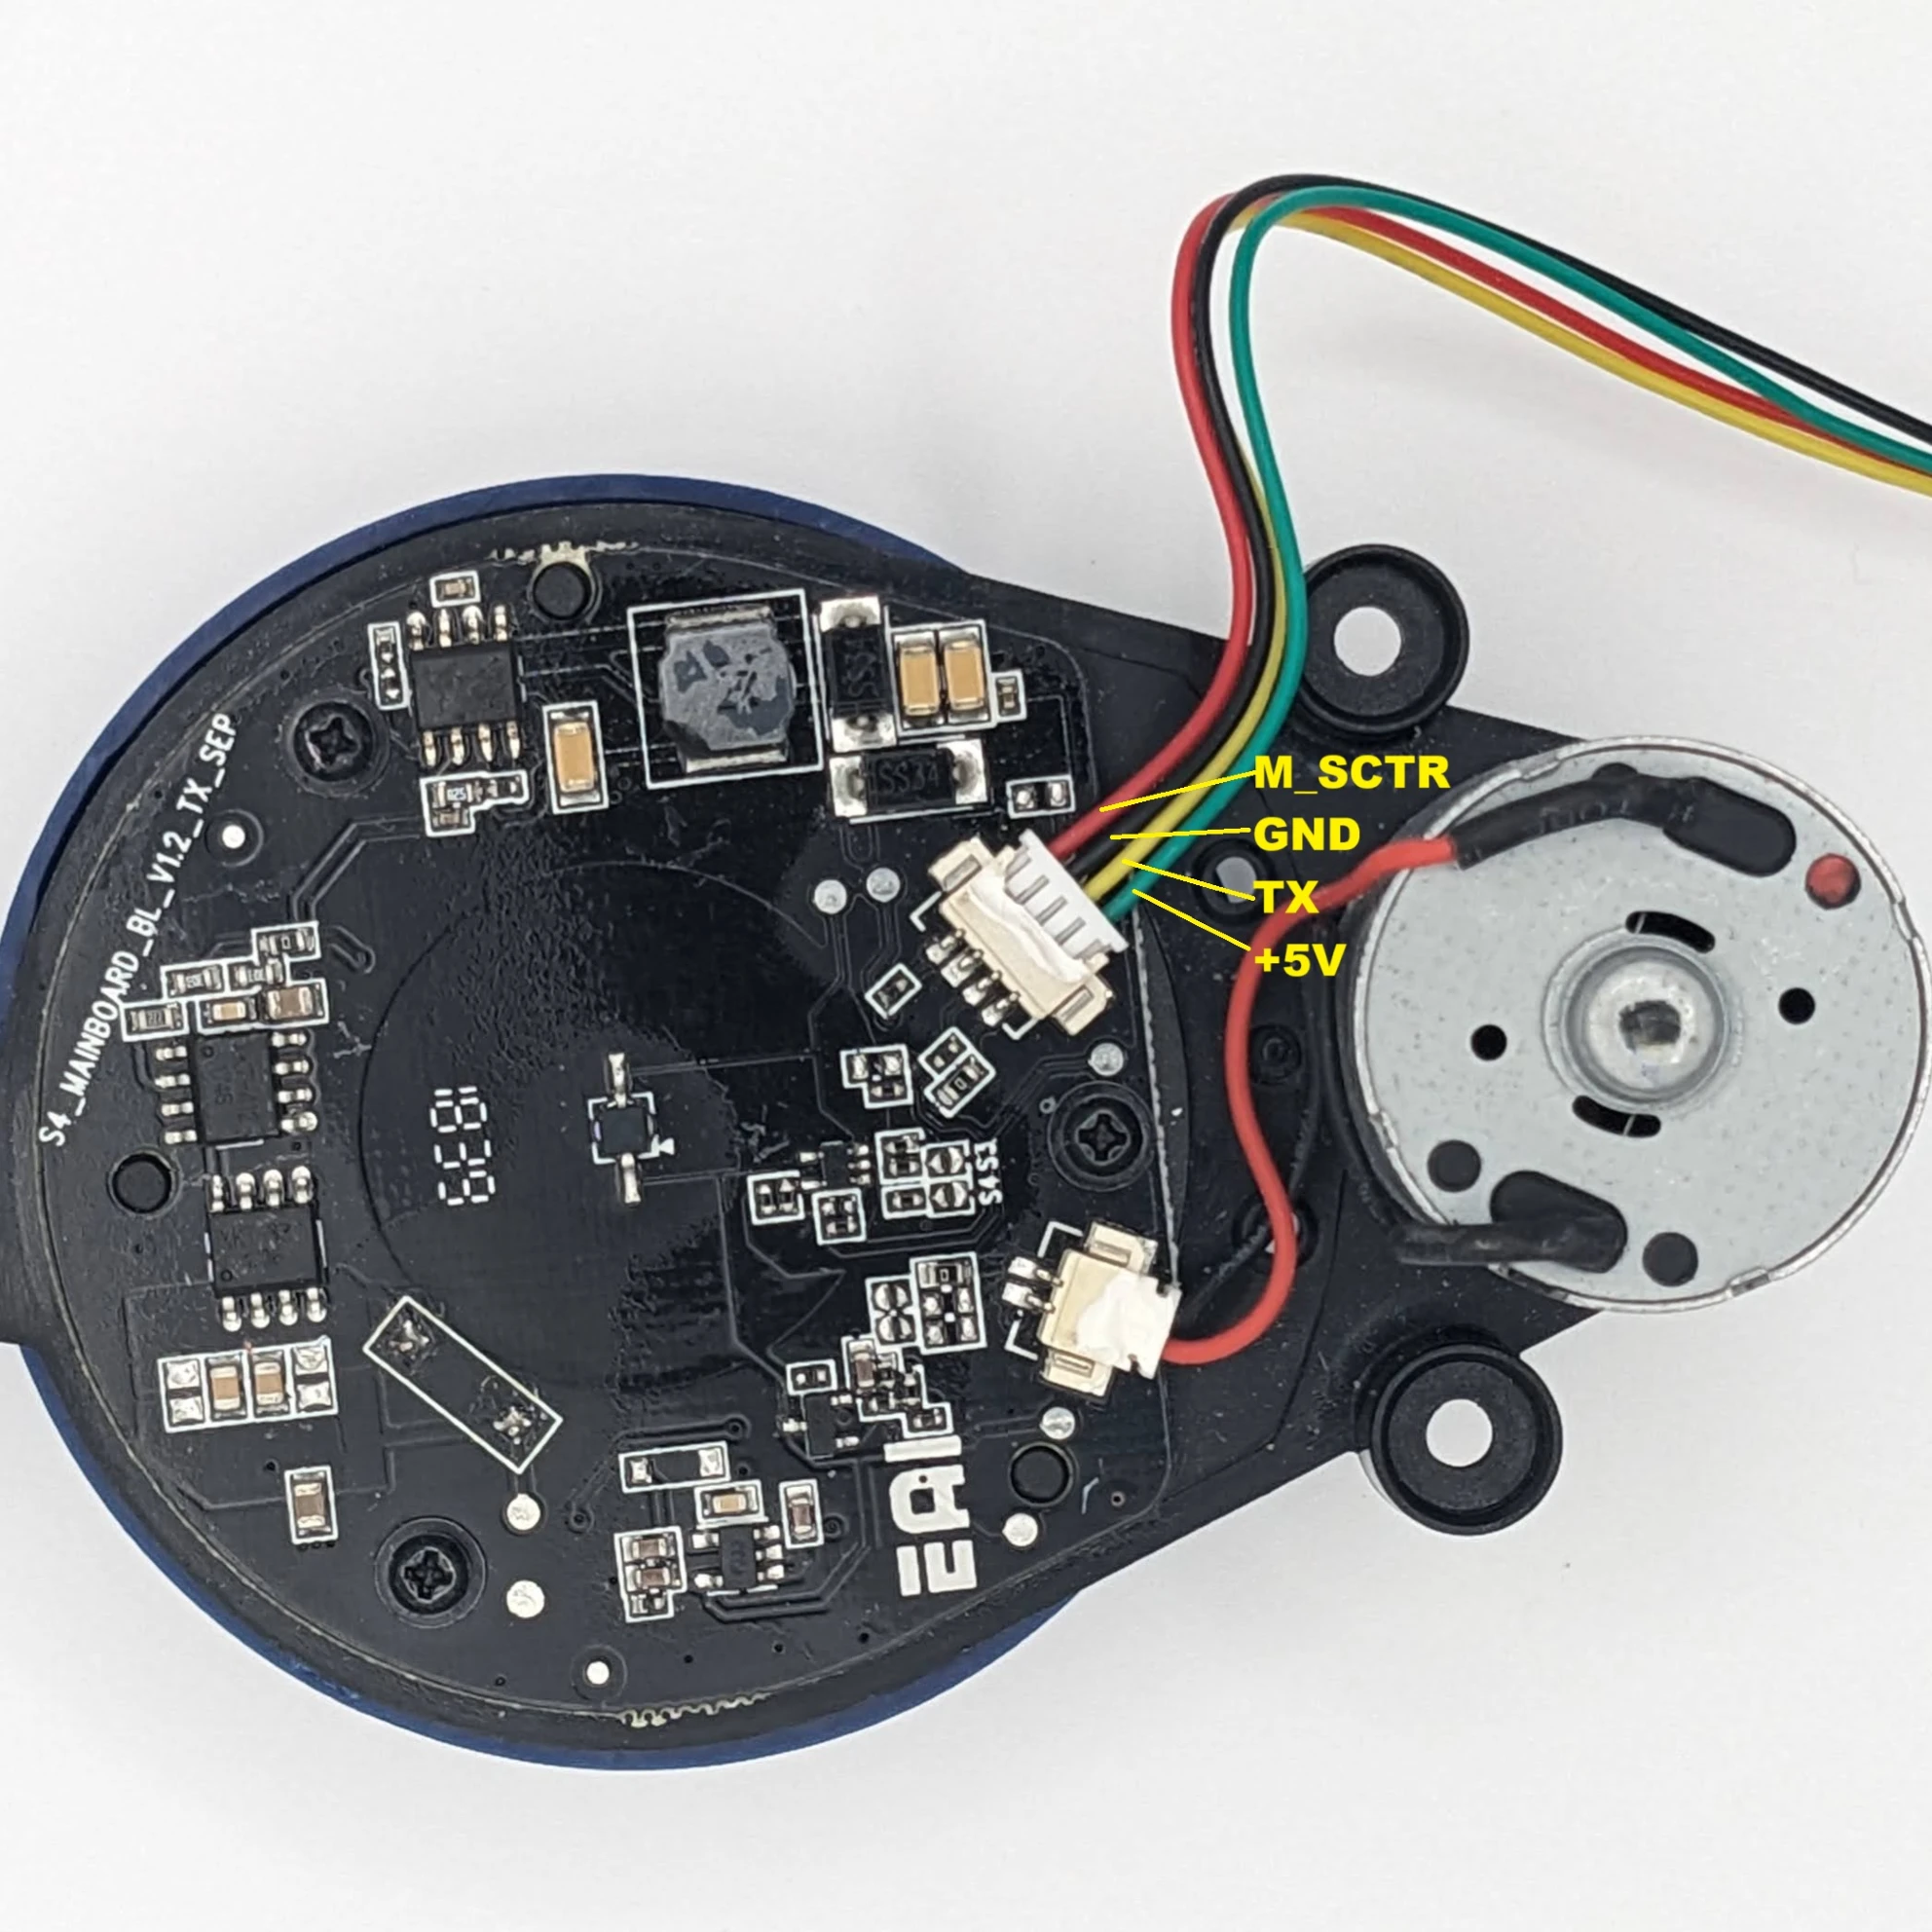
The photo below shows the YDLIDAR X2/X2L connector pinout.
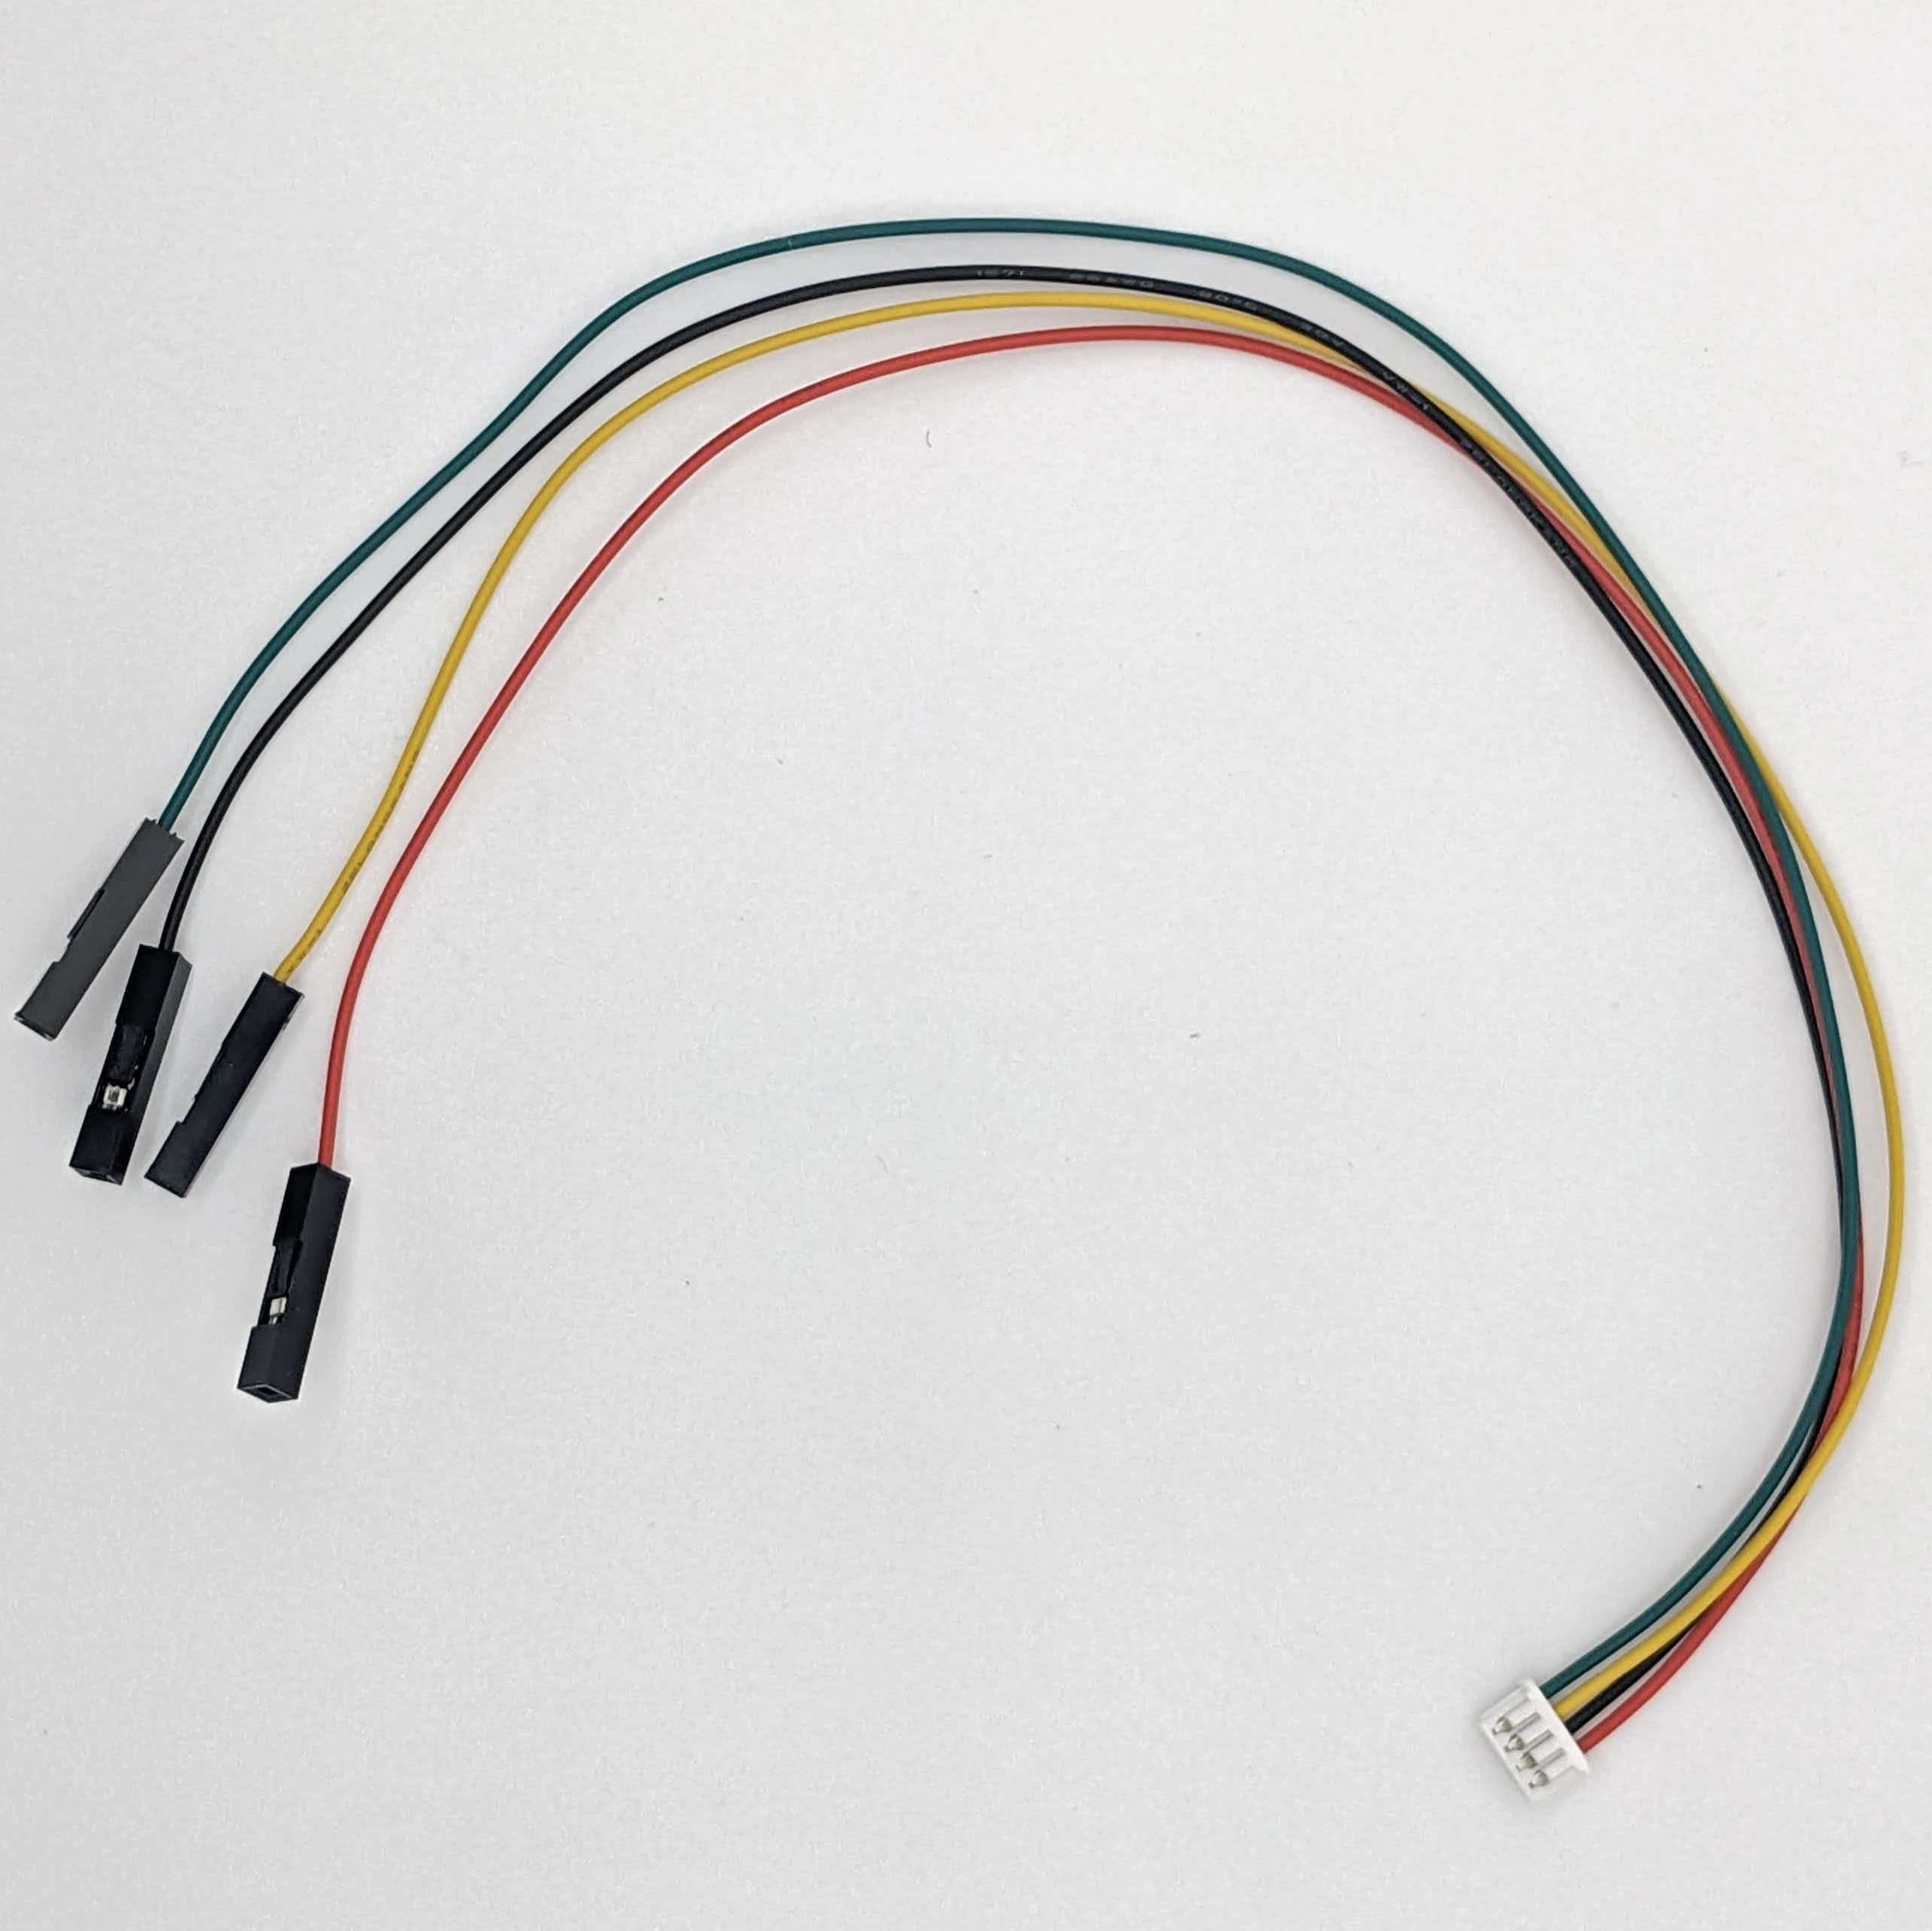
For easy connection, Maker’s Pet sells a breakout cable for YDLIDAR X2, X2L, X3, X3 PRO and SCL with 2.54mm female DuPont connectors.
Make the following connections between YDLIDAR X3/X3PRO X2/X2L Lidar and BDC-30P/BDC-38C4 board:
- LiDAR TX to board LiDAR header TX
- LiDAR GND to board LiDAR header GND
- LiDAR +5V to board LiDAR header +5V
- LiDAR M_CTR/M_SCTR to board LiDAR header PWM
Firmware Configuration
Edit your Kaia.ai firmware config.yaml configuration file. In the lidar section comment out everything except your LiDAR model:
YDLIDAR X3for YDLIDAR X3YDLIDAR X3 PROfor YDLIDAR X3 PROYDLIDAR X2for YDLIDAR X2YDLIDAR X2Lfor YDLIDAR X2L
Here is reference documentation for config.yaml.
Here is an example configuring YDLIDAR X3 PRO for use.
1
2
3
4
5
6
7
8
9
10
11
12
13
14
15
16
lidar:
# model: LDROBOT LD14P
# model: NEATO XV11
# model: SLAMTEC RPLIDAR A1
# model: XIAOMI LDS02RR
# model: YDLIDAR SCL
# model: YDLIDAR X2
# model: YDLIDAR X2L
# model: YDLIDAR X3
  model: YDLIDAR X3 PRO
# model: 3IROBOTIX DELTA-2G
# model: 3IROBOTIX DELTA-2A 115200
# model: 3IROBOTIX DELTA-2A
# model: 3IROBOTIX DELTA-2B
# model: YDLIDAR X4 PRO
# model: YDLIDAR X4
Your board’s config.yaml already contains ESP32 GPIO pin mapping to the board’s LiDAR connector, including LiDAR TX, RX, PWM and EN:
For illustration purposes, here is the ESP32 GPIO pin assignment LiDAR from the BDC-30P config.yaml.
1
2
3
4
5
6
lidar:
  gpio:
    tx: 35
    rx: 27
    pwm: 13
    en: 32
Upload your edited configuration file to ESP32 as Arduino sketch data, see video.
Next, boot your firmware and check the Arduino Serial Monitor. The firmware should print your LiDAR model, e.g. LIDAR model YDLIDAR X3 PRO.
1
2
3
4
5
6
7
8
9
10
11
12
13
14
15
16
17
18
19
20
21
22
23
24
25
ets Jul 29 2019 12:21:46

rst:0x1 (POWERON_RESET),boot:0x13 (SPI_FAST_FLASH_BOOT)
configsip: 0, SPIWP:0xee
clk_drv:0x00,q_drv:0x00,d_drv:0x00,cs0_drv:0x00,hd_drv:0x00,wp_drv:0x00
mode:DIO, clock div:1
load:0x3fff0030,len:1344
load:0x40078000,len:13964
load:0x40080400,len:3600
entry 0x400805f0

Kaia.ai firmware version 0.8.0-iron
ESP IDF version v4.4.7-dirty
SPIFFS mounted successfully
/network.yaml found; loaded OK
/config.yaml found; loaded OK
To enter web config push-and-release EN, then push-and-hold BOOT within 1 sec
Board model MINI-BDC30P-BODY with BDC-30P, version v1.1.1, manufacturer makerspet.com
LIDAR model YDLIDAR X3 PRO
LIDAR RX buffer size 1024, baud rate 115200
Battery ADC attenuation 7.00, voltage 2.68V
Motor driver type IN1_IN2; motor encoder type AB_QUAD
Motor Max RPM 180.00; encoder PPR 1035.00 TPR 4140.00

Connecting to WiFi NETGEAR48 ...
ROS2 Software Configuration
Follow this step if you are using Kaia.ai ROS2 PC software for robot mapping, navigation, SLAM and visualization. Otherwise you can skip this step.
Override the default LiDAR model when you launch your robot using the lidar_model argument, see more details:
Set the lidar_model argument as follows:
YDLIDAR-X3for YDLIDAR X3YDLIDAR-X3-PROfor YDLIDAR X3 PROYDLIDAR-X2-X2Lfor YDLIDAR X2 and X2L
1
ros2 launch kaiaai_bringup physical.launch.py robot_model:=makerspet_loki lidar_model:=YDLIDAR-X3-PRO
The full list of supported lidar_model arguments is here.
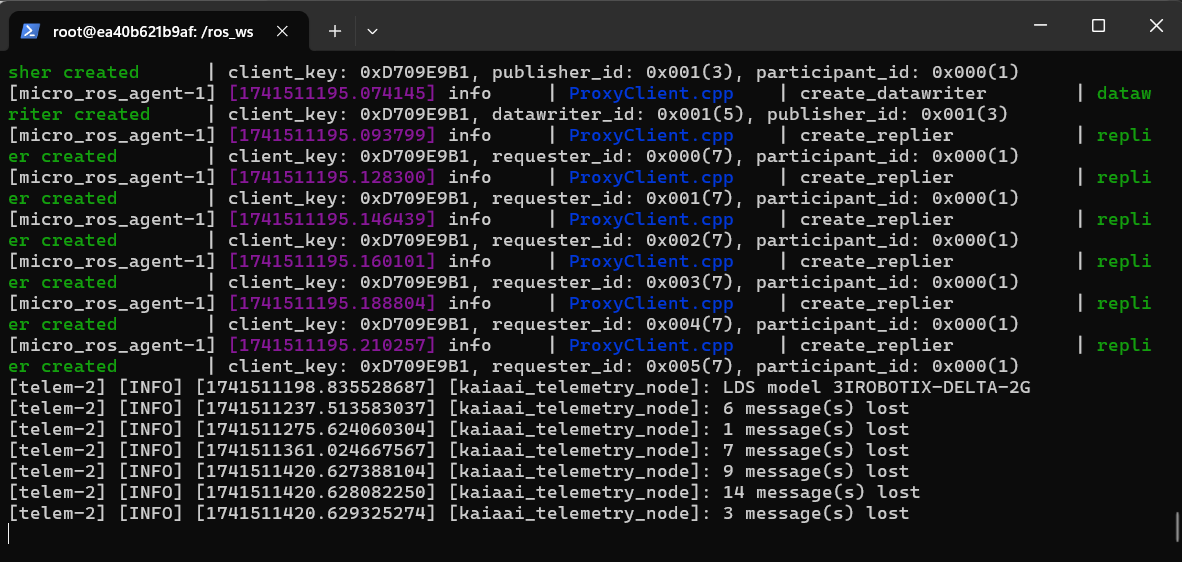
When your robot’s ESP32 connects to your local ROS2 PC, your local PC should print your LiDAR model LDS model YDLIDAR-X3-PRO.
Your YDLIDAR sensor should be powered on and spinning.
In the meantime, you should see your ESP32 firmware printing out LiDAR RPM around 4.75 or 5. This means your Lidar is spinning at 4.75 rotations per second.
1
2
3
4
5
6
7
connected, IP 192.168.1.153
Connecting to Micro-ROS agent 192.168.1.113 ...

Telem avg 46 max 52ms, LiDAR RPM 4.75, wheels RPM 0.00 0.00, battery 8.00V, RSSI -60dBm
Telem avg 46 max 52ms, LiDAR RPM 4.75, wheels RPM 0.00 0.00, battery 8.00V, RSSI -59dBm
Telem avg 46 max 52ms, LiDAR RPM 4.75, wheels RPM 0.00 0.00, battery 8.00V, RSSI -61dBm
Telem avg 46 max 52ms, LiDAR RPM 4.75, wheels RPM 0.00 0.00, battery 8.00V, RSSI -62dBm