How to Connect TB6612FNG Motor Driver to Your ESP32 DIY Robot

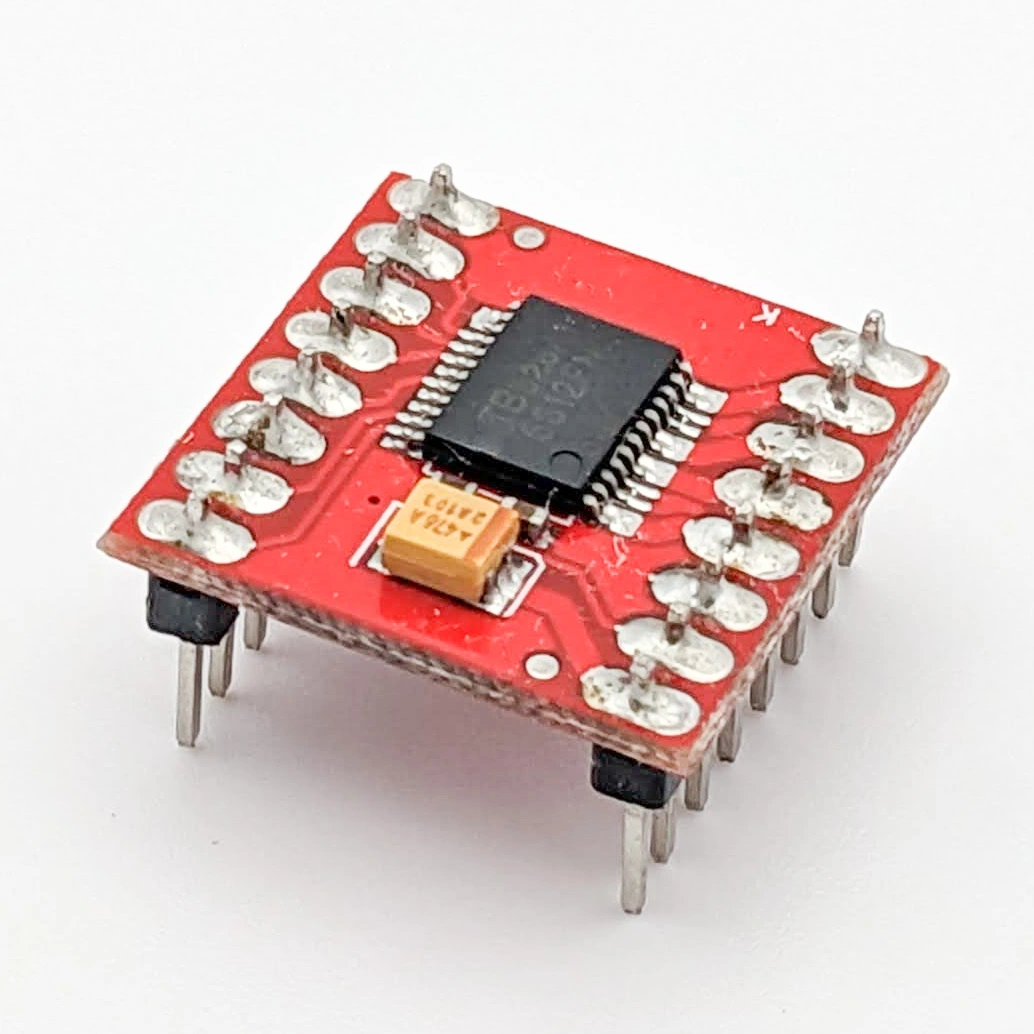
TB6612FNG is a low-cost driver IC for brushed DC motors - popular with DIY enthusiasts to build small wheeled robots. One TB6612FNG can drive two motors with power supply voltage up to 15V, average output current up to 1.2A per motor and up to 3.2A peak current. I’ve used TB6612FNG it on many occasions to drive small, low-cost N20-size motors.
Hardware Wiring
Here is how you can connect a TB6612FNG motor driver IC to ESP32 to drive a couple of small brushed DC motors.
Kaia.ai firmware aims works with all kinds of boards and drivers, so you can reuse your components.
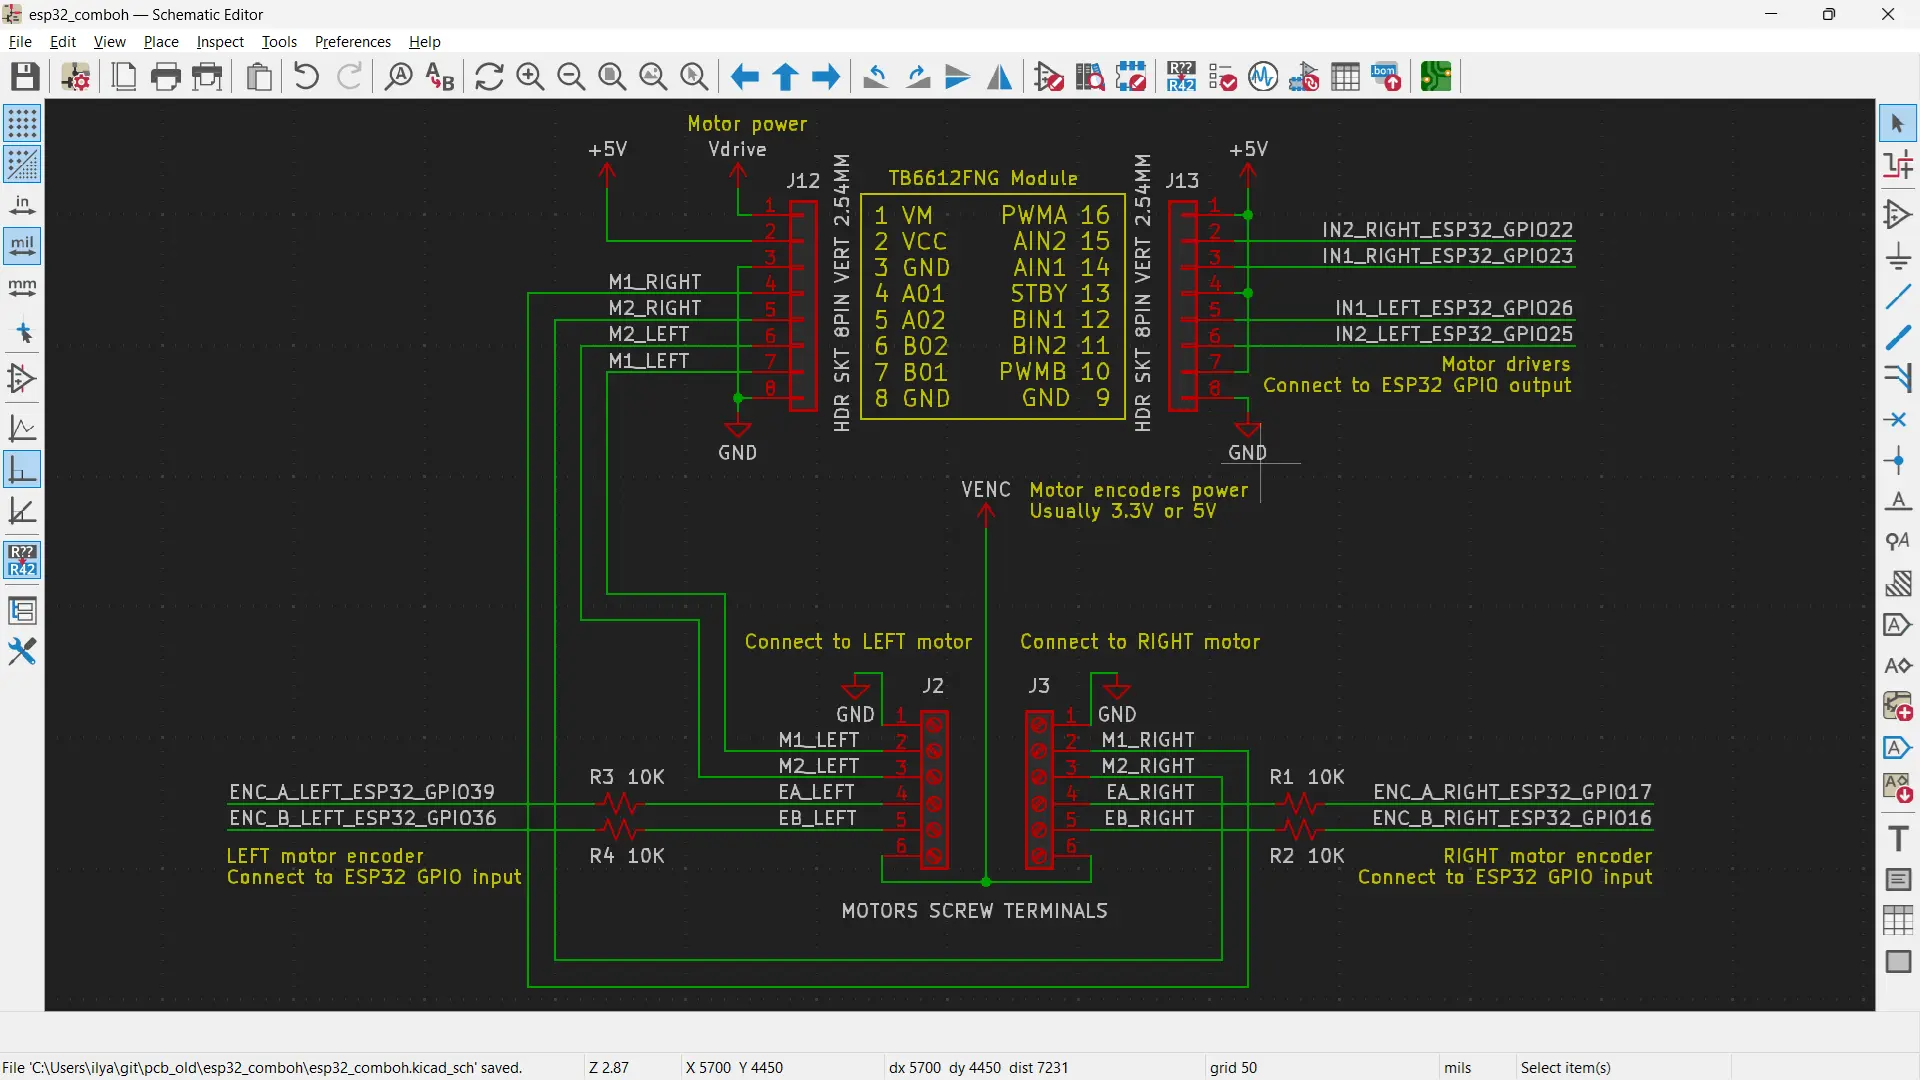
Here is a schematic connecting TB6612FNG to ESP32 30-pin dev board.

In the schematic
- ESP32 GPIOs (configured as outputs) connect to TB6612FNG that drives two (left and right) DC brushed motors.
- ESP32 GPIOs (configured as inputs) also connect to (quadrature) motor encoders. Each quadrature motor encoder has 2 signals called A and B (or C1, C2 or something like that).
- resistors in series with GPIO inputs protect ESP32 from 5V encoder signal levels
The choice of GPIO numbers to connect TB6612FNG and encoders is up to you - subject to ESP32 GPIO own limitations. Read more about ESP32 GPIO limitations:
Firmware Configuration
Kaia.ai firmware has a special config.yaml file
where you can specify your GPIO assignments. Kaia.ai firmware loads this file at boot time.
Please see more config.yaml documentation here.
Edit config.yaml for TB6612FNG as follows:
- set
motor.driver.typetoIN1_IN2 - assuming TB6612FNG AO1 and AO2 outputs drive the left motor
- set
motor.driver.left.gpio.in1to GPIO number driving TB6612FNG AIN1 input - set
motor.driver.left.gpio.in2to GPIO number driving TB6612FNG AIN2 input
- set
- assuming TB6612FNG BO1 and BO2 outputs drive the right motor
- set
motor.driver.right.gpio.in1to GPIO number driving TB6612FNG BIN1 input - set
motor.driver.right.gpio.in2to GPIO number driving TB6612FNG BIN2 input
- set
Upload the edited config.yaml to ESP32 as sketch data, see video.
Here is an example of TB6612FNG setup in config.yaml:
1
2
3
4
5
6
7
8
9
10
11
12
13
motor:
  driver:
    type: IN1_IN2
  left:
    driver:
      gpio:
        in1: 26
        in2: 25
  right:
    driver:
      gpio:
        in1: 23
        in2: 22